
Hello, fellow crocheters! Today, I’m so excited to share a pattern that I truly believe will become a staple in your crafting repertoire: the Ribbed Wonder Easy Crochet Hat. This isn’t just another hat pattern; it’s a fantastic introduction to creating a beautiful, warm, and wonderfully textured accessory, perfect for beginners and enjoyable for seasoned crocheters alike.
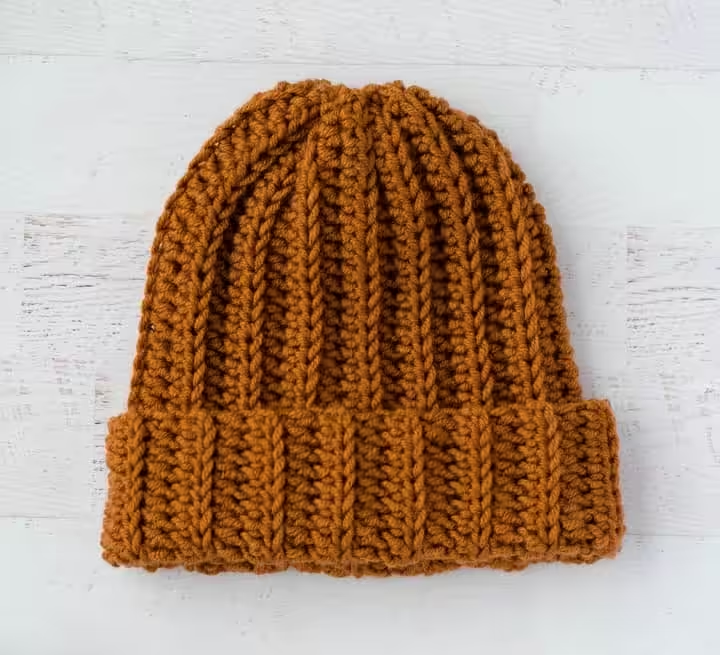
What makes this hat so special? It’s all in the ribbing! We’ll be using a simple half double crochet stitch worked into the back loop, creating a lovely knit-look texture that’s surprisingly easy to achieve. I love how quickly this hat works up, thanks to the bulky yarn, making it an incredibly satisfying project for a weekend or when you need a quick gift. Plus, the seaming and cinching techniques are incredibly straightforward, ensuring a polished finish even for your very first hat. Whether you’re making it for yourself, a loved one, or simply to enjoy the meditative rhythm of crochet, this hat is sure to bring joy.
You’ll be crocheting a simple rectangle in rows, then seaming it into a tube and cinching one end to form the top of the hat. This construction method is wonderfully intuitive and allows for easy size adjustments. Get ready to create a cozy, stylish hat that you’ll be proud to wear or gift!
Ribbed Wonder Easy Crochet Hat Pattern
Materials
- US L 11/8 mm crochet hook
- 4.25 oz #5 Bulky weight yarn (sample used Lion Brand Color Made Easy in Kombucha color)
- Tapestry needle
- Scissors
Finished Size
Adult Size: Fits a head circumference of 21″ – 23″. Finished hat is approximately 20″ around by 13″ tall before folding over the cuffed edge.
Toddler Size: Fits a head circumference of 18-20″. Finished rectangle will be approximately 10″ wide by 17.25″ long.
Child Size: Fits a head circumference of 19-21″. Finished rectangle will be approximately 11″ wide by 18″ long.
Yarn Information
- Weight: #5 Bulky
- Sample Yarn: Lion Brand Color Made Easy (acrylic)
- Yardage: Approximately 4.25 oz (amount for adult size)
- Substitutions: Other #5 Bulky weight yarns that work up similarly. The pattern has also been successfully made with Lion Brand Hue + Me (a chunky wool blend) and Scheepjes Chunky Monkey (an Aran weight yarn that works up similarly with the same hook size).
Hook and Tools
- US L 11/8 mm crochet hook
- Tapestry needle
- Scissors
Abbreviations
- ch — chain
- st(s) — stitch(es)
- hdc — half double crochet
- bl — back loop
- sl st — slip stitch
Pattern Notes
- This hat is worked flat in rows of half double crochet, then seamed into a tube. One end is then cinched to form the top of the hat.
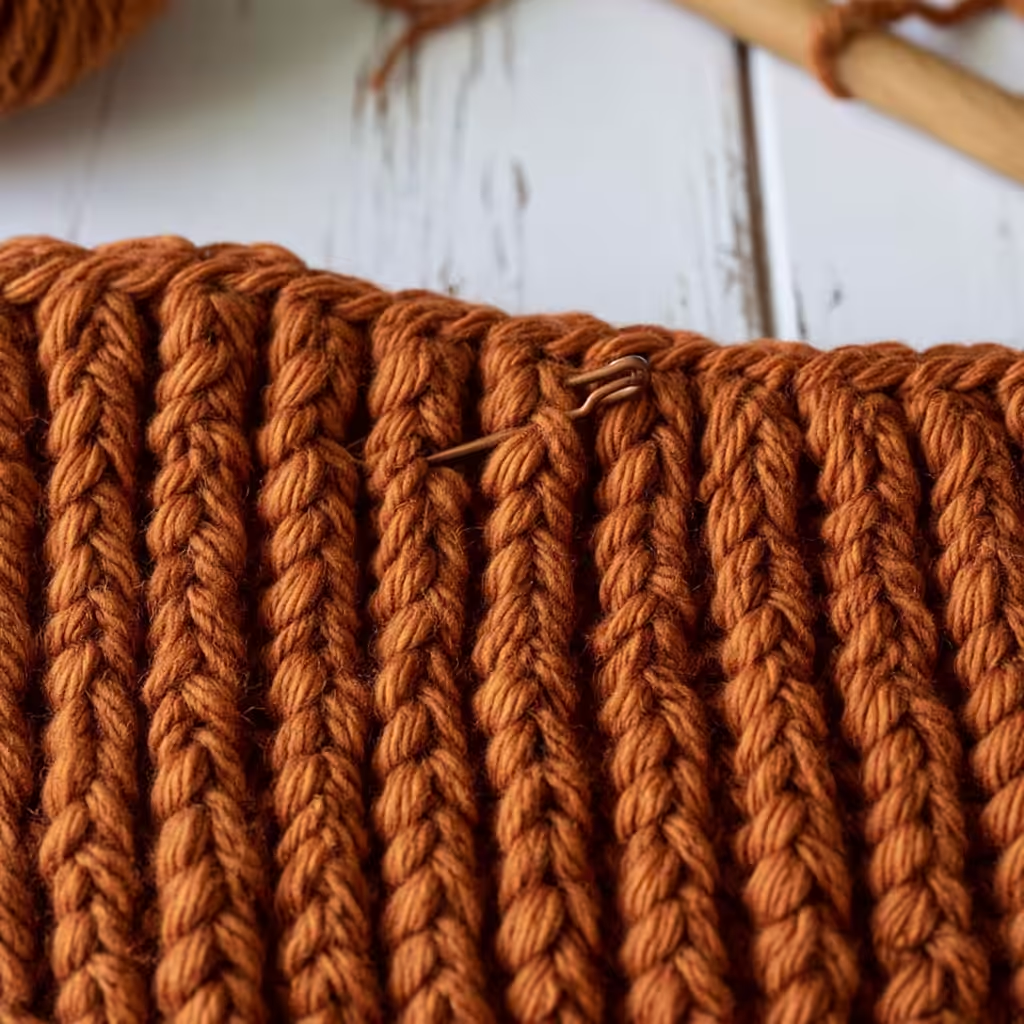
- Starting with Row 2, all stitches are worked in the back loop only (the loop furthest from you as you are working the current row).
- The initial chain-2 at the beginning of rows does NOT count as a stitch.
- Work your slip stitches for seaming loosely to maintain the hat’s stretchiness.
Instructions
To Begin: Chain 37
Row 1: Hdc in 3rd chain from hook and in each chain across row. (35 sts)
Rows 2–30: Ch 2 (does not count as a stitch), hdc in the back loop across row. (35 sts)
At the end of Row 30, your hat will be a rectangle of ribbed crochet measuring approximately 13″ wide by 20″ tall.
Finishing
- Seaming the Hat: Ch 1 and turn work. Take the bottom of your work and fold it up so that the starting edge is on top of the row to be worked. The seam is worked by slip stitching the two ends together. Insert your crochet hook into the starting chain and then into the back loop of the next stitch to be worked. Slip stitch together. Continue to slip stitch both ends together across the row, making sure to work the slip stitches loosely so the hat remains stretchy. Note that this is the wrong side of the work.
- Fasten Off: At the end of the row, cut the yarn, leaving a long strand for cinching the top, and fasten off.
- Cinching the Top: The work is now a tube with the wrong side facing out. Rotate your work and thread the fastened-off yarn end onto a yarn needle. Work a running stitch with the yarn around the open end to gather the top. Pull the yarn tight and tie a knot to secure. The end from the start of the project should also be there; you can tie these two ends together into a knot. There will still be a small hole at the top, so continue to use the threaded yarn needle to make stitches to close up the hole. When done, knot the yarn again and then weave in all ends.
- Final Touches: Turn the hat right side out and fold up the brim. For a slouchy hat look, you can skip the folded brim.
Size Adjustments
This pattern is adaptable to fit different head sizes by adjusting the initial chain and number of rows.
- Toddler Ribbed Wonder (Head Size 18-20″):
- Start with a chain of 28.
- Each row will have 26 stitches.
- Work 26 rows.
- Finished rectangle will be approximately 10″ wide by 17.25″ long.
- Child Ribbed Wonder (Head Size 19-21″):
- Start with a chain of 32.
- Each row will have 30 stitches.
- Work 28 rows.
- Finished rectangle will be approximately 11″ wide by 18″ long.
For both toddler and child sizes, proceed to the seaming and finishing instructions after completing the rectangle.
To adapt to other yarn weights or custom sizes, you can create a gauge swatch with your desired yarn and hook. Measure your swatch to determine the number of stitches and rows needed to achieve the desired dimensions for your rectangle (width for height, length for circumference).
Olivia’s Tips
I absolutely adore the ribbed texture of this hat, and it’s all thanks to working in the back loop only. If you’re new to this technique, take your time to identify the back loop correctly – it’s the loop furthest from you as the work faces you. This creates those beautiful ridges that mimic knitting.
For a seamless finish when joining the ends, remember to keep your slip stitches loose. If they’re too tight, the seam might pucker or lose its stretch, which is crucial for a comfortable hat. I always recommend using a stitch marker at the beginning of your rows, especially if you’re a beginner, to help keep track of your stitch count and ensure straight edges. And don’t forget to weave in your ends securely at the end for a professional look!
If you’re looking for another quick and satisfying project that uses basic stitches, check out my Crochet a Beginner-Friendly Flower Coaster in 45 Minutes!