
Hello, fellow crafters! With the holiday season just around the corner, there’s nothing quite like adding a personal, handmade touch to our decorations. And what could be more charming than these cozy, colorful crochet Christmas baubles? They’re not only beautiful but also wonderfully beginner-friendly, making them a perfect project to get into the festive spirit.
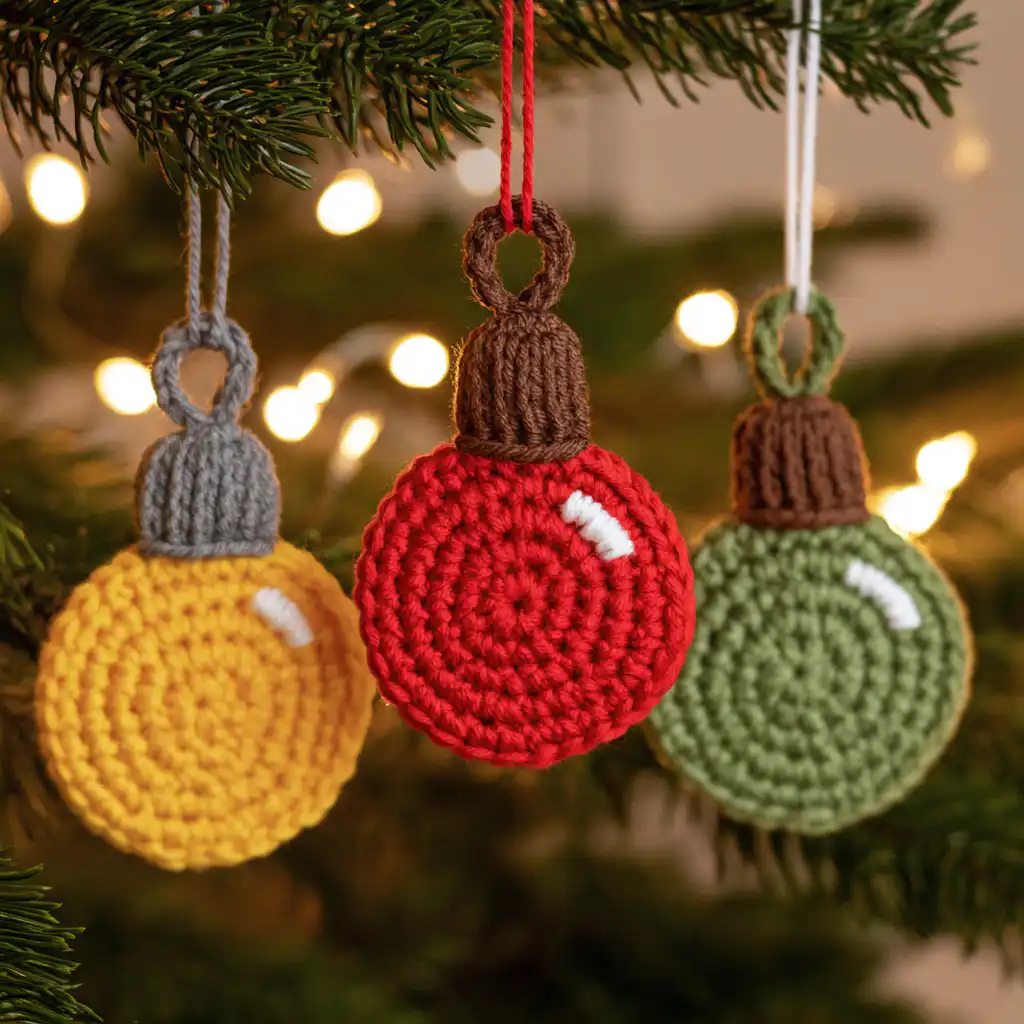
I absolutely adore making these baubles because they’re so versatile. You can use them to adorn your Christmas tree, tie them onto gifts for an extra special touch, hang them in windows, or even use them as charming accents on your holiday table. Wherever they go, these handmade ornaments bring such a warm, personal feel to the season. Plus, they’re a fantastic way to use up those smaller bits of scrap yarn you might have, making them a budget-friendly option too. Let’s grab our hooks and yarn, and dive into creating some festive magic!
Crochet Christmas Bauble Crochet Pattern
Materials
- Yarn
- Crochet hook (2.5mm)
- Scissors
- Tapestry needle
Abbreviations
- CH — Chain
- MR — Magic Ring
- DC — Double Crochet
- SL St — Slip Stitch
- SC — Single Crochet
Pattern Notes
- The magic ring is counted as the first round of this pattern.
- The initial chain 3 at the beginning of a round counts as a double crochet stitch.
- To substitute for a magic ring, you can chain 4 and then slip stitch to the first chain to form a ring.
- Use a tapestry needle to sew in yarn tails for a neat finish.
Instructions
To Begin: Choose your yarn and hold the open end in your fingers. Start by making a magic ring (MR).
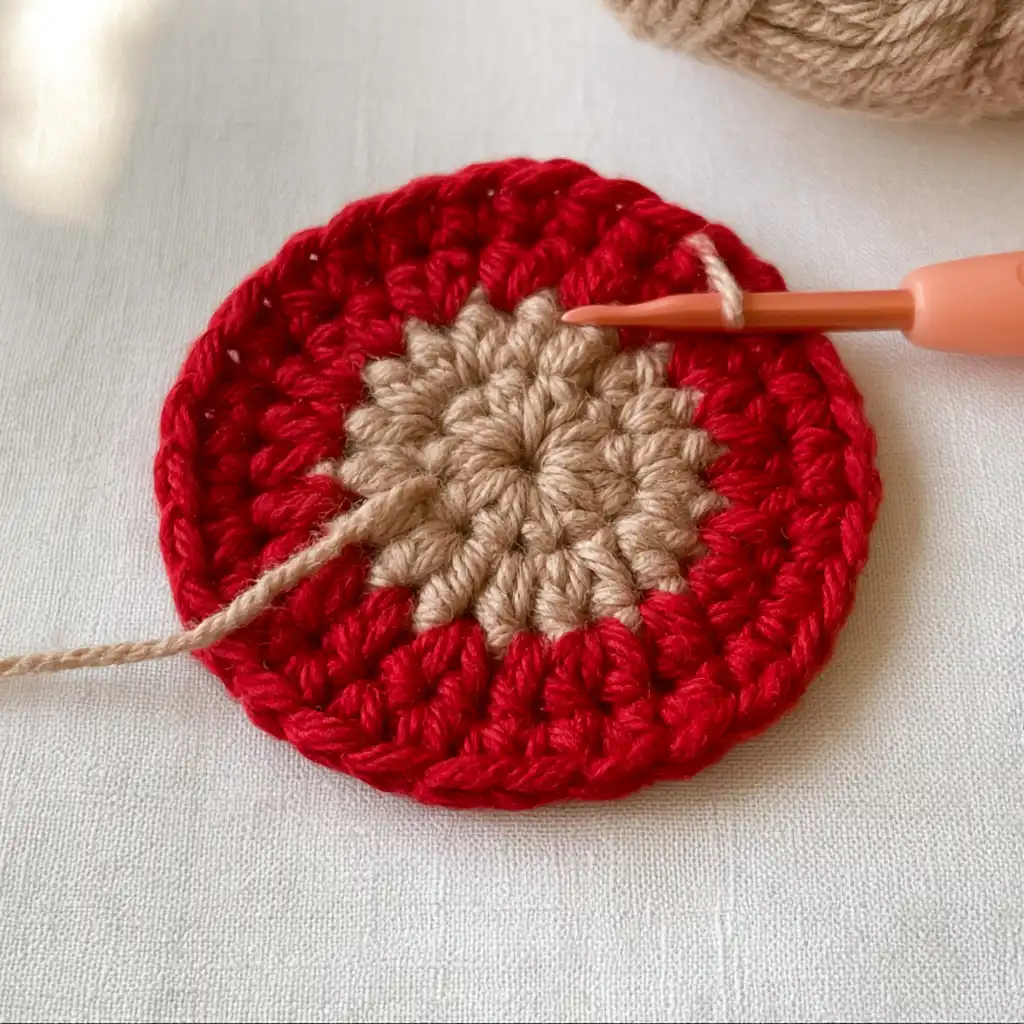
Round 1: Work 3 CH. Into the MR, work 14 DC. Join with a SL St into the 3rd CH of the initial 3 CH. (15 sts, including initial CH 3)
Round 2: Work 3 CH. Work 2 DC into each stitch around the circle. Join with a SL St into the top CH of the initial 3 CH. (30 sts, including initial CH 3)
Round 3: Work 3 CH. Work 1 DC in the next stitch, then 2 DC in the stitch after that (both in the same stitch). Repeat this pattern of (1 DC, 2 DC) all the way around until the end of the round. Join with a SL St into the top CH of the initial 3 CH. (45 sts, including initial CH 3)
Round 4: Work 3 CH. Work 1 DC in the next stitch, 1 DC in the stitch after that, then 2 DC in the next stitch. Repeat this pattern of (1 DC, 1 DC, 2 DC) around. Join with a SL St. (60 sts, including initial CH 3)
Finishing the Bauble Body: Leave a yarn tail and cut the yarn. Sew the remaining yarn tail on the back of the pattern using a tapestry needle.
Cap Part
Insert new yarn (you can use a different colored yarn for the cap part) through any outer stitch of the finished bauble body.
Row 1: Work 5 SC into the next 5 stitches. (5 sts)
Row 2: Work 2 CH, then 1 DC into each stitch of this row. (5 sts, including initial CH 2)
Row 3: Repeat Row 2 (Work 2 CH, then 1 DC into each stitch of this row). (5 sts, including initial CH 2)
When you finish Row 3, make a SL St and leave a long tail. Cut off the yarn and draw the tail to the backside of the pattern.
Hanger Loop
Use the same yarn to start a stitch with a slip knot. Chain 15. Leave a long tail and cut off yarn from the bundle.
Assembly
Make a loop with the 15 chain stitches of the hanger loop. Sew the open ends to the cap part of the crochet ornament. Sew at the backside of the cap to secure the loop. Your ornament should now be complete!
Olivia’s Tips
- Yarn Choice: For a soft and fluffy look, I recommend selecting milk cotton yarns. They give these baubles a lovely, cozy texture that’s perfect for holiday decor.
- Magic Ring Alternative: If you’re a beginner and find the magic ring a bit tricky, don’t worry! You can easily substitute it by chaining 4 stitches and then slip stitching into the first chain to form a ring. It works just as well.
- Consistent Tension: Maintaining nice, even tension throughout your work is key to getting a beautifully shaped bauble. Try to keep your stitches consistent for the best results.
- Stiffening Your Bauble: If you’d like your bauble to have a more sturdy structure, you can apply a fabric stiffener once it’s complete. This can help it hold its shape perfectly.
- Explore More: Once you get the hang of this pattern, consider trying other round crochet patterns to expand your skills! You might enjoy making a crochet Christmas tree or even Christmas ornament coasters for more festive fun.
FAQ
- What kind of yarn should I use for these baubles? For a soft and fluffy look, milk cotton yarns are recommended. You can also use other yarns you have on hand, especially scrap yarn.
- What if I have trouble with the magic ring? If the magic ring is tricky, you can substitute it by chaining 4 stitches and then slip stitching into the first chain to form a ring.
- Can I make these baubles in different sizes? This pattern is written for one size. While you can experiment with different hook sizes and yarn weights, the stitch counts provided are for this specific bauble.
- How do I make the bauble stiff? You can use a fabric stiffener on the crochet ornament after it’s completed if you want to give it a more sturdy structure.
1 thought on “Crochet Christmas Baubles: An Easy DIY Guide”