
Hello, fellow makers! Today, I’m thrilled to share a project that brings a touch of handmade charm and elegance to any dining table: the Honeycomb Bee Placemat. This pattern is one of those delightful surprises that looks incredibly intricate and impressive, but is surprisingly straightforward to crochet. It’s truly a fantastic way to elevate your home decor or create a thoughtful, personalized gift.
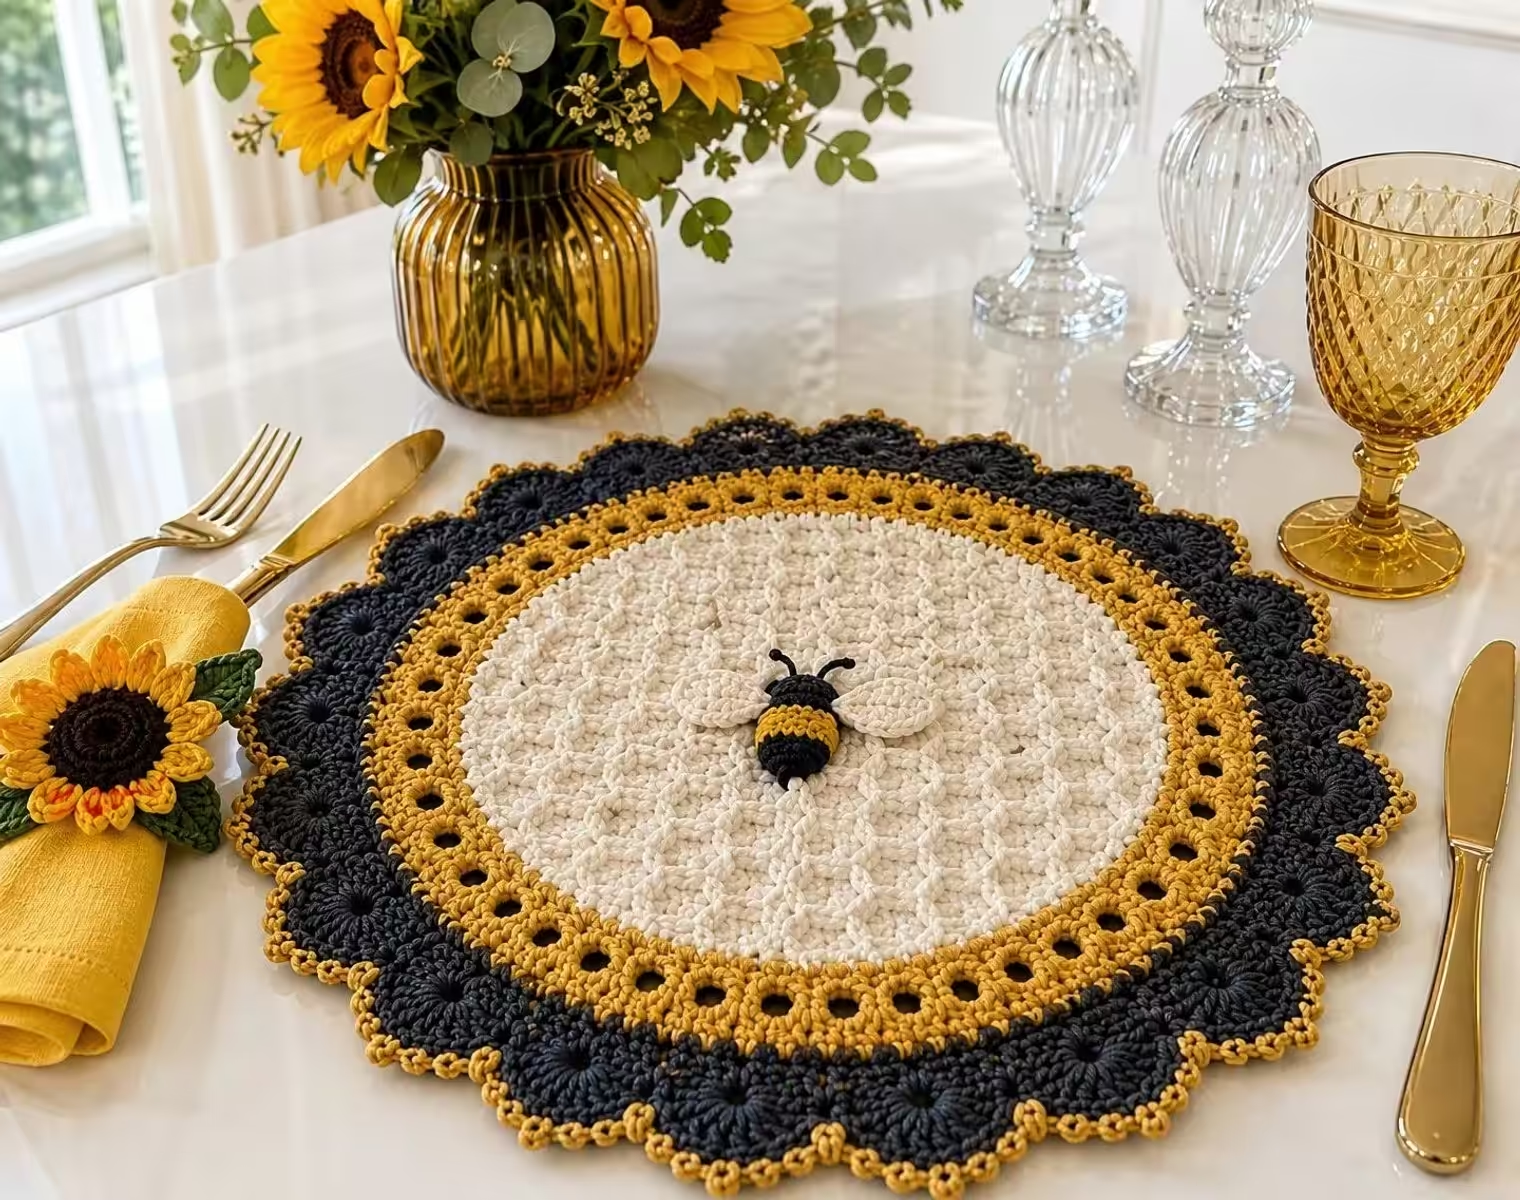
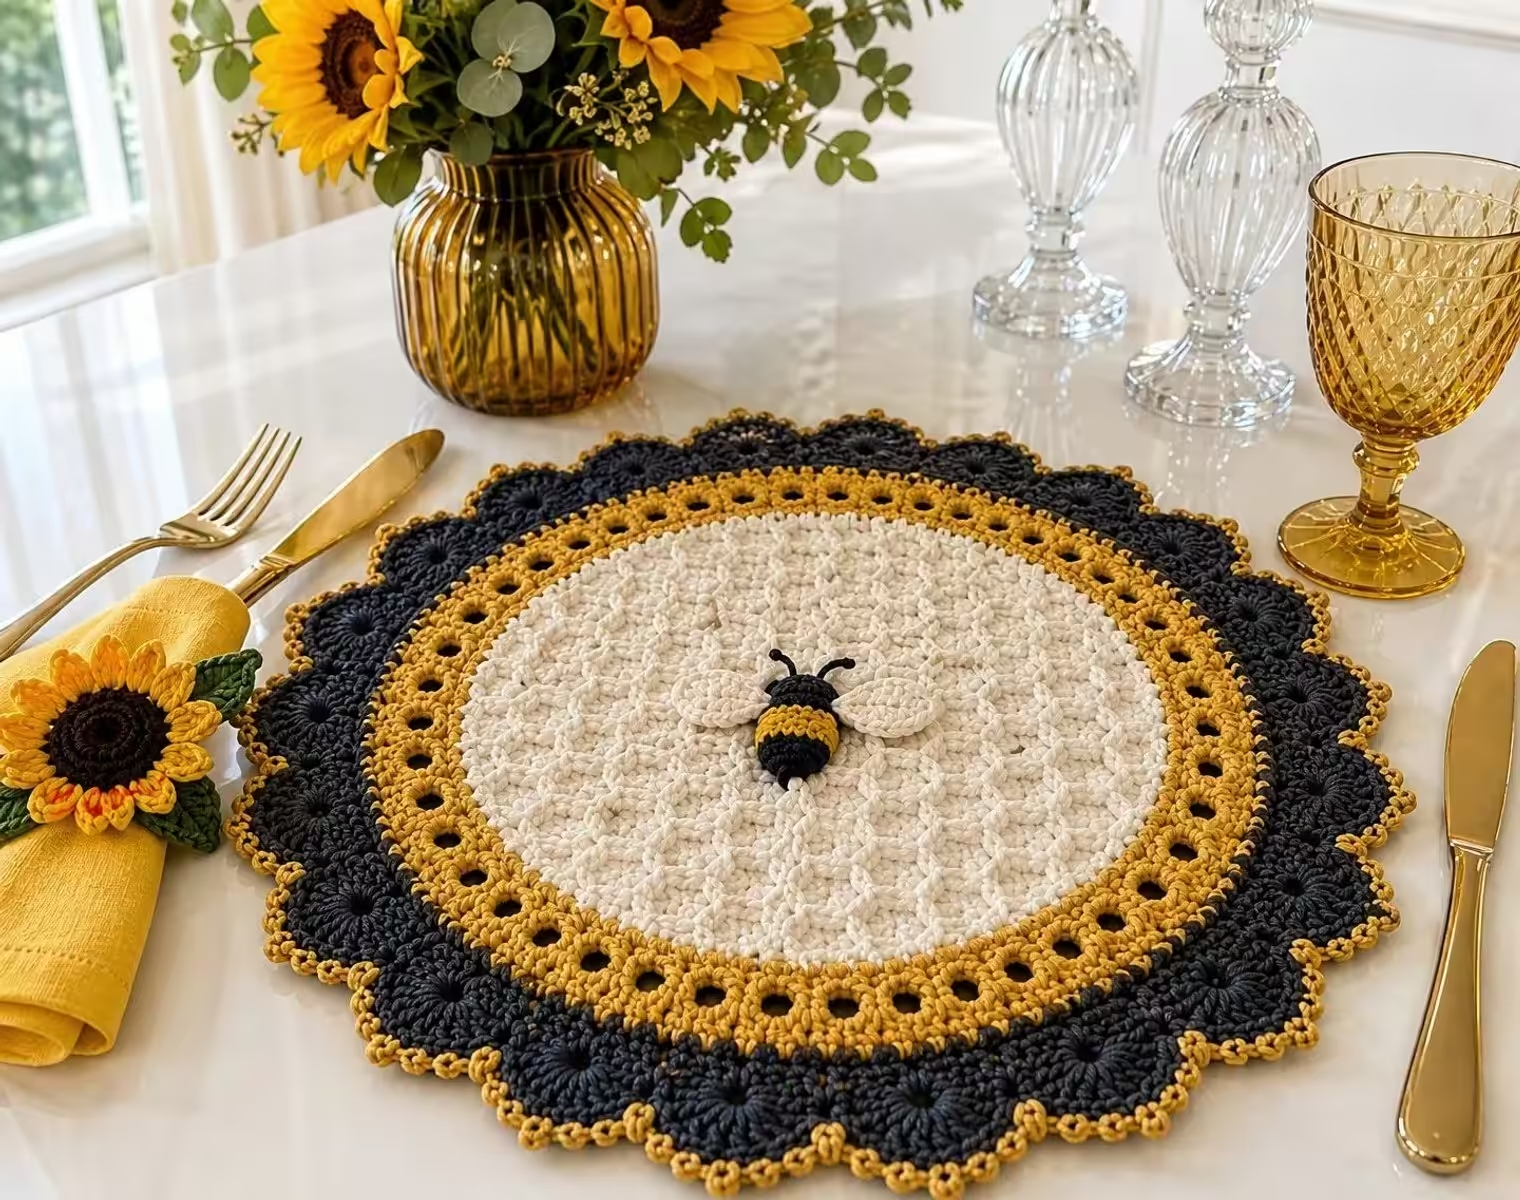
What I particularly love about this placemat is its unique combination of textures and details. The ivory center, with its gorgeous honeycomb pattern, provides a wonderful tactile experience, while the sweet little crocheted bee adds a whimsical touch. The mustard yellow eyelet band and the charcoal gray scalloped border with golden picots complete the picture, giving it a sophisticated, modern farmhouse feel. It’s a project that keeps your hands busy and your mind engaged, yet is relaxing enough to work on while unwinding. Plus, these placemats make fantastic housewarming gifts, bridal shower presents, or a lovely treat for your own home.
If you’ve been curious about trying front post and back post stitches, this pattern is your perfect opportunity. The honeycomb texture is created by a simple alternating pattern, and once you get the rhythm, it practically works itself. You’ll finish with a beautiful 15-inch (38 cm) round placemat that’s just right for a dinner plate. While the skill level is intermediate, don’t let that deter you if you’re comfortable with basic stitches and ready for a fun challenge. I’ll guide you through those special stitches, making sure you feel confident every step of the way.
Honeycomb Bee Placemat Crochet Pattern
Materials
- Worsted weight cotton yarn in the following colors:
- Ivory yarn for the honeycomb center
- Mustard yellow yarn for the eyelet ring
- Charcoal gray yarn for the scalloped border
- Black yarn for the bee body
- Golden yellow yarn for the bee stripes
- Cream yarn for the bee wings
- Small amount of green yarn (optional for decoration)
Hook and Tools
- 4 mm crochet hook
- Yarn needle
- Scissors
- Stitch markers
Finished Size
Approximately 15 inches (38 cm) in diameter.
Yarn Information
Worsted weight cotton yarn is recommended for its durability, washability, and ability to lie flat, making it ideal for placemats.
Abbreviations
- ch – chain
- sl st – slip stitch
- sc – single crochet
- hdc – half double crochet
- dc – double crochet
- tr – treble crochet
- st – stitch
- sp – space
- sk – skip
Special Stitches
- Front post stitches: Insert your hook from front to back around the post (the vertical part) of the stitch below, then back to front. Yarn over and complete the stitch as usual. This pushes the stitch forward, creating texture.
- Back post stitches: Insert your hook from back to front around the post of the stitch below, then front to back. Yarn over and complete the stitch as usual. This pushes the stitch backward.
Gauge
18 double crochet stitches and 10 rows = 4 inches.
Note: Gauge is not critical for this project. The finished size may vary slightly, which is perfectly fine. The key is to maintain firm stitches to ensure the placemat lies flat. If your work ruffles, try a smaller hook; if it cups, try a larger hook.
Pattern Notes
- The initial chain 3 at the beginning of rounds counts as a double crochet stitch.
- The project is worked in rounds.
- For the honeycomb texture, ensure you alternate front post and back post stitches consistently.
- Cotton yarn tends to relax with blocking, which helps the placemat lie flat and shapes the scallops.
Instructions
Center Honeycomb Circle (Ivory Yarn)
Round 1: Make a magic ring. Ch 3 (counts as first dc). Work 11 dc into the ring. Join with sl st to the top of the beginning ch 3. (12 dc)
Quick tip: If you prefer not to use a magic ring, ch 4 and sl st to form a ring, then work into the ring.
Round 2: Ch 3. Work 1 dc in the same st. Work 2 dc in each st around. Join with sl st. (24 dc)
Round 3: Ch 3. Work 1 dc in the next st. Work 2 dc in the next st. *1 dc in the next st, 2 dc in the next st.* Repeat from * to * around. Join with sl st. (36 dc)
Round 4: Ch 3. Work dc stitches evenly around, increasing every third stitch (i.e., 2 dc in every 3rd st). Join with sl st. (48 dc)
Round 5 (Creating the Honeycomb Texture): Ch 2. Work alternating front post and back post stitches around the circle. Join with sl st. (e.g., *FPDC in next st, BPDC in next st.* Repeat from * to * around). (48 sts)
Rounds 6 through 10: Continue the honeycomb texture (alternating front post and back post stitches) while increasing evenly each round to keep the work flat. Continue until your circle measures approximately 10 inches across. Note: Adjust increases as needed to maintain flatness. If ruffling, reduce increases; if cupping, add more increases.
Bee Motif
Body: Using black yarn, ch 5. Work sc around both sides of the chain to create an oval shape. (e.g., 2 sc in 2nd ch from hook, 1 sc in next 2 ch, 3 sc in last ch, continue on other side of ch: 1 sc in next 2 ch, 1 sc in last st). Join with sl st. Fasten off.
Stripes: Using golden yellow yarn, add stripes to the bee body using surface crochet or embroidered lines with a yarn needle.
Wings: Using cream yarn, make two small oval loops: ch 8, sl st to form a loop. Fasten off. Make a second wing the same way.
Antennae: Using black yarn and a yarn needle, stitch two small curved lines above the bee head.
Attach the completed bee to the center of the ivory honeycomb section using a yarn needle.
Mustard Eyelet Band
Round 1: Attach mustard yarn to any st. Ch 3 (counts as first dc). Work dc evenly around the entire piece. Join with sl st.
Round 2: Ch 3, sk 1 st, dc in next st, ch 1. *Sk 1 st, dc in next st, ch 1.* Repeat from * to * around. Join with sl st to the 2nd ch of beginning ch 3.
Round 3: Ch 3. Work dc into each st and into each ch-1 sp around. Join with sl st to the top of beginning ch 3.
Charcoal Scalloped Border
Round 1: Attach charcoal yarn to any st. Ch 1. Work sc evenly around the entire piece. Join with sl st to the first sc.
Round 2: Ch 3. Work 4 dc into the same st. Sk 2 sts. Sc into the next st. *Ch 3, 4 dc into the same st. Sk 2 sts. Sc into the next st.* Repeat from * to * around to create the scalloped edge. Join with sl st to the first ch of beginning ch 3. Note: You may need to adjust your stitch count slightly at the end of the round to ensure scallops end evenly.
Round 3 (Picot Edge): Ch 1. Work sc into each scallop. When desired, change to gold yarn and make a picot: (sc, ch 3, sl st into the first ch, sc). Continue working sc into scallops, adding golden picots as desired. Join with sl st to the first sc. Fasten off.
Finishing Your Placemat
Weave in all ends using your yarn needle. For cotton yarn, weave each end through at least 2 inches of stitches in different directions to secure.
Lightly block the placemat using steam or a damp blocking method. Lay flat on a blocking mat or clean towel. Lightly spray with water or hold a steam iron a few inches above the surface. Gently shape the scallops evenly with your fingers.
Allow the piece to dry completely before using. This may take several hours, depending on humidity.
Olivia’s Tips
One of my favorite things about this pattern is how much character the combination of stitches brings. If you’re new to front post and back post stitches, don’t be intimidated! Practice a few on a small swatch first. Once you get the hang of how to insert your hook around the post, it becomes very intuitive, and you’ll love the raised texture it creates.
For the little bee motif, remember that handmade items have charm in their uniqueness. Don’t strive for absolute perfection; a slightly quirky bee often has even more personality! The stripes and wings will make it recognizable no matter what.
Blocking is a step I always recommend, especially for cotton projects like this. It really helps the stitches relax, opens up the pattern, and ensures your placemat lies perfectly flat on your table. It makes a huge difference in the final look!
If you’re planning to make a full set of these placemats, consider working in an “assembly line” style. Complete all the ivory honeycomb centers first, then add all the bees, then all the mustard eyelet bands, and finally all the charcoal borders. This can often make the process feel faster and more efficient.
FAQ
Here are some common questions you might have about this pattern:
- What kind of yarn is best for this placemat?
Worsted weight cotton yarn is recommended because it is durable, washable, and helps the placemat lie flat without curling. - Is this pattern suitable for beginners?
The pattern is rated intermediate due to the use of front post and back post stitches. However, if you are comfortable with basic stitches and willing to learn new techniques, the instructions are clear enough for an adventurous beginner. - How do I ensure my placemat lies flat?
Maintaining consistent tension is key. If your placemat ruffles, try using a smaller hook. If it cups, try a larger hook. Blocking the finished item also significantly helps it lie flat. - Can I make the placemat larger or smaller?
This pattern is designed for a 15-inch diameter placemat. Specific instructions for altering the size are not provided, as the stitch counts and increase patterns are tailored to achieve this specific dimension. - How should I care for my finished placemat?
Hand wash gently in cool water and lay flat to dry. Avoid harsh detergents to help preserve the cotton texture and vibrant colors.