
Hello, fellow makers! Are you ready to create something truly special and incredibly useful? I’m so excited to share this beginner-friendly crochet backpack pattern with you. There’s something incredibly satisfying about carrying a bag you’ve made with your own hands, and this stylish backpack is both practical and a joy to create. It’s a fantastic project for anyone looking to make a sturdy, everyday item.
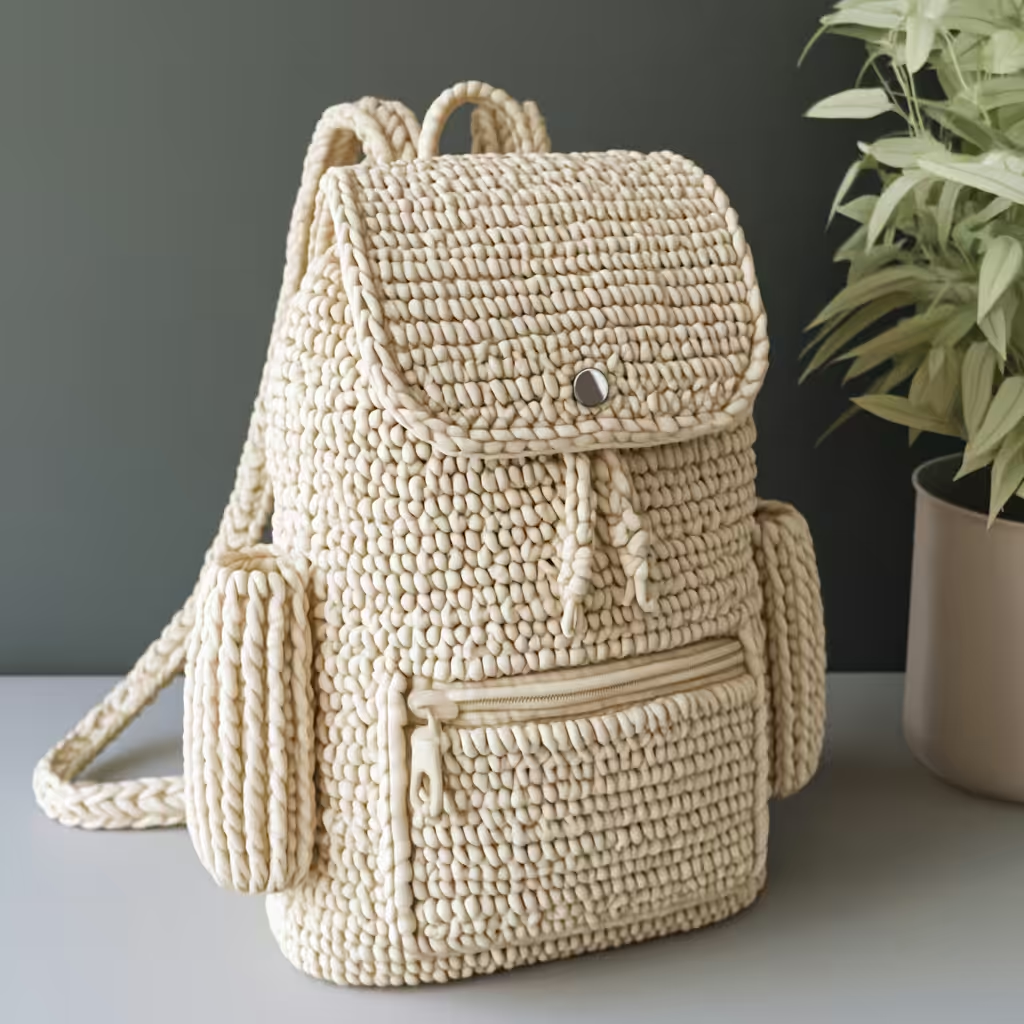
This pattern walks you through crafting a durable backpack, starting with a rectangular base and building up the body in continuous rounds for a seamless finish. We’ll then add a shaped flap, practical front pockets, and comfortable straps and a handle. I love how versatile this design is – you can choose your favorite chunky yarn color to truly make it your own. It’s a project that builds confidence and leaves you with a gorgeous, functional accessory!
Crochet Backpack Pattern
Materials
- Chunky Yarn (cotton or acrylic recommended): Approximately 500-600 grams (a natural cream or beige color works beautifully)
- Crochet Hook: 8mm (or size recommended on your yarn label to achieve a dense fabric)
- Scissors
- Stitch Markers
- Measuring Tape
- Button or Magnetic Snap: For closing the flap
- Sewing Needle and Thread: To attach button/snap
- Zipper (Optional): For the front pocket, slightly shorter than pocket width
Finished Size
The finished backpack is approximately 10 inches wide, 4 inches deep at the base, and 12-14 inches tall, but you can adjust these dimensions to your preference.
Yarn Information
Choose a soft, sturdy chunky yarn. Cotton or acrylic are great choices for durability and ease of care. The pattern suggests approximately 500-600 grams, but having a little extra is always a good idea.
Hook and Tools
- 8mm crochet hook
- Scissors
- Stitch markers
- Measuring tape
- Sewing needle and thread
Abbreviations (US Terms)
- ch — chain
- sc — single crochet
- sl st — slip stitch
- st(s) — stitch(es)
- BLO — back loop only
- sc2tog — single crochet 2 stitches together (decrease)
Pattern Notes
- The initial chain-1 at the beginning of rows does not count as a stitch.
- The base is worked in joined rounds, turning after each round.
- The body is worked in continuous rounds (a spiral) without joining, for a seamless finish. Use a stitch marker to indicate the beginning of each round when working the body.
- The flap, pockets, and straps are worked in rows.
- Stitch counts are provided at the end of each relevant round/row.
Special Stitches
Single Crochet 2 Together (sc2tog) / Decrease: Insert hook into the first stitch, yarn over, pull up a loop (2 loops on hook), insert hook into the next stitch, yarn over, pull up a loop (3 loops on hook), yarn over, pull through all three loops on hook.
Instructions
The Base
To begin, create a slip knot on your hook.
Round 1: Ch 20. Work 1 sc in the 2nd ch from hook and in each ch across. (19 sc)
Round 2: Ch 1, turn. Sc in each st across. In the last st, work 3 sc. Continue working down the other side of the foundation chain: sc in each st across. In the very last st (which is also the first st of the round), work 3 sc. Join with a sl st to the first sc of the round. (40 sc)
Repeat Round 2 until the base measures approximately 10 inches wide and 4 inches deep. Remember to work 3 sc into each corner stitch to maintain the rectangular shape. Each round will increase the size of your rectangle.
Building the Body
We will now work in continuous rounds (spirals) without joining. Place a stitch marker at the beginning of each round.
Round 1 (Body): Ch 1. Working in the back loop only (BLO) of each stitch, sc in each st around. (Stitch count will be the same as the final round of your base.)
Rounds 2 onwards (Body): Continue working sc in each st around (through both loops this time) in continuous rounds, without joining. Keep spiraling upwards. Continue until the backpack body reaches your desired height, approximately 12-14 inches.
Fashioning the Flap
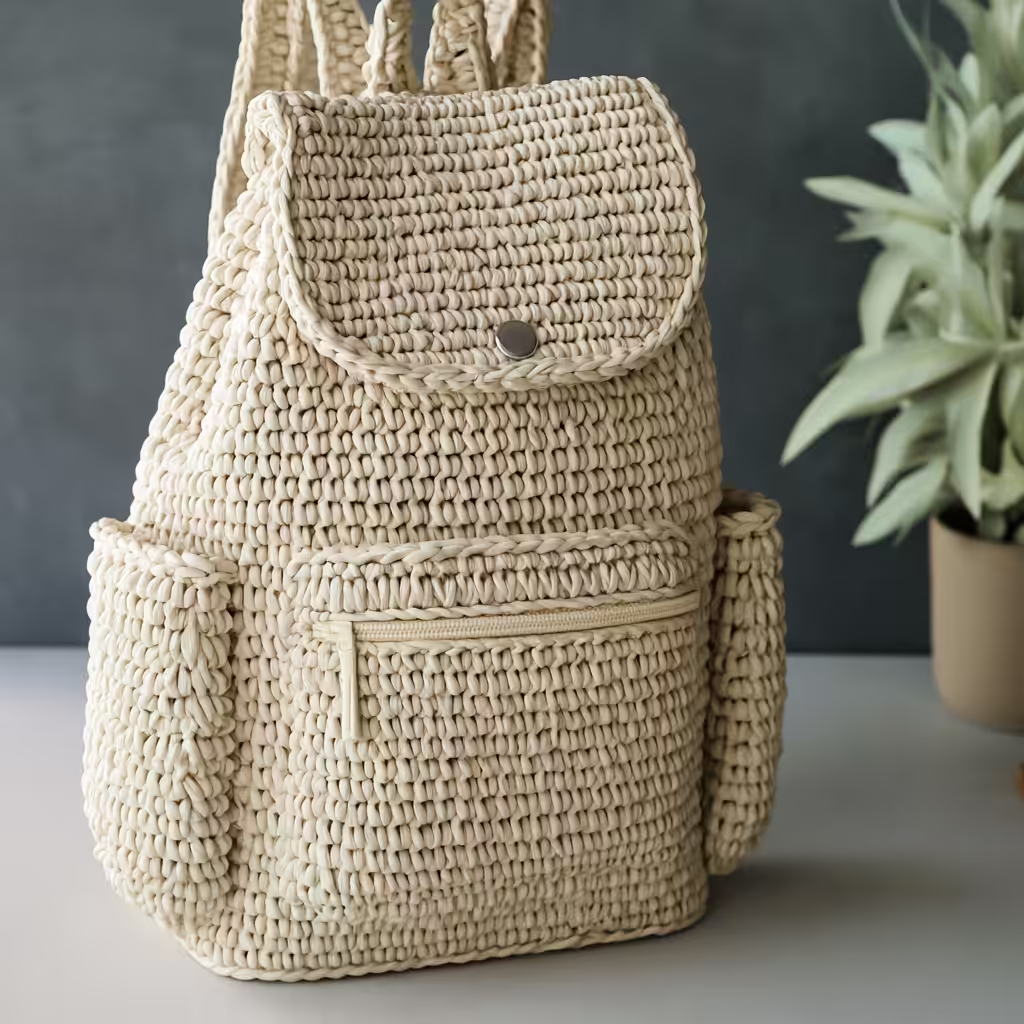
Position your backpack so the back is facing you. Count approximately one-third of the way around from one side of the back. Join your yarn here with a sl st.
Row 1 (Flap): Ch 1, sc across the top edge for about two-thirds of the backpack opening width. Turn. (Number of stitches will depend on your backpack’s opening width.)
Rows 2 onwards (Flap): Ch 1, sc in each st across. Turn. Repeat this row, decreasing by one stitch at the beginning and end of every other row (sc2tog at the start and end of the row) to create a tapered shape. Continue until the flap is the desired length and tapered. To achieve a rounded bottom, you can decrease more rapidly in the last few rows or simply work fewer stitches in those rows.
Crafting the Pockets
You will make two identical pocket panels.
Making the Pocket Panels: Ch 15 (or adjust for desired width). Sc in the 2nd ch from hook and in each ch across. (14 sc) Ch 1, turn. Sc in each st across. Repeat this row until your pocket panel is square or rectangular, depending on your preference and the proportions of your backpack.
Assembling the Straps and Handle
Making the Straps: For each strap, ch 6. Sc in the 2nd ch from hook and in each ch across. (5 sc) Ch 1, turn. Sc in each st across. Repeat this row until each strap is approximately 24-30 inches long, or your desired length.
Making the Handle: Ch 6. Sc in the 2nd ch from hook and in each ch across. (5 sc) Ch 1, turn. Sc in each st across. Repeat this row until the handle is approximately 6-8 inches long.
Finishing
Attaching the Pockets and Optional Zipper
Position the pocket panels on the front of your backpack body, evenly spaced. Pin them in place. Using your crochet hook and yarn, sc around three sides of each pocket panel, attaching it to the backpack body as you go. Leave the top edge of the pocket open.
If adding a zipper, carefully sew the zipper along the top edge of the lower pocket opening using your sewing needle and thread.
Attaching Straps and Handle
Position the straps on the back of the backpack. Attach one strap to each side of the base at the bottom, and then attach the other end to the upper back of the backpack. Pin them in place and sew them securely using your sewing needle and thread, or by sl st with your crochet hook for a crocheted look.
Attach the handle to the top center back of the backpack, between the strap attachments. Sew securely in place.
Olivia’s Tips
Creating a backpack is a wonderful project to build your crochet skills! Here are a few tips to help you along the way:
- Consistent Tension: Maintaining an even tension throughout your work is key for a sturdy and professional-looking backpack. If your stitches are too loose, the fabric might sag. If they’re too tight, it can be difficult to work into.
- Stitch Markers are Your Best Friend: Especially when working in continuous rounds for the body, a stitch marker at the beginning of each round will save you from guessing where your rounds start and end.
- Don’t Be Afraid to Adjust: This pattern provides guidelines, but feel free to adjust the size of the base, height of the body, or length of the straps to fit your personal needs and preferences. Measuring as you go is always a good idea!
- Weave in Ends as You Go: While it might seem tedious, weaving in ends as you finish sections will make the final finishing process much quicker and more enjoyable. It also prevents loose ends from becoming unraveled later. For more tips on finishing touches, check out this guide on making personalized crochet ornaments, which includes advice on neat finishing.
- Blocking (Optional but Recommended): Once your backpack is complete, consider lightly blocking it. This can help shape the backpack, even out your stitches, and give it a more polished look.
Frequently Asked Questions
What kind of yarn is best for a crochet backpack?
A chunky and sturdy yarn like cotton or acrylic is recommended for a crochet backpack. These fibers provide durability and help the backpack maintain its shape, making it practical for everyday use.
How do I make the backpack bigger or smaller?
This pattern is written for a specific size, but you can adjust the dimensions by altering the initial chain count for the base and increasing or decreasing the number of rounds for the base, body, flap, and straps. The pattern does not provide specific stitch counts for other sizes, so you would need to adjust proportionally.
What if I don’t want to add a zipper to the pocket?
Adding a zipper to the pocket is optional. If you prefer not to, simply omit that step. The pocket will still be functional with an open top, or you could add a small button and loop closure instead.
How do I keep my edges straight when working in rows?
To keep your edges straight when working in rows (like for the flap, pockets, and straps), ensure you are consistent with your turning chains and that you are working into the very first and very last stitch of each row. Using a stitch marker in the first stitch of a new row can help you identify where to place your last stitch on the return row.
1 thought on “Crochet Your Own Stylish Backpack: A Step-by-Step Guide”