
The fall season brings so many things to love: colorful leaves, crisp air, and, of course, pumpkin pie! If you’re looking to add a little more autumn magic to your home decor, this crochet pumpkin pie slice coaster pattern is the perfect way to do just that. It’s a quick and simple project that even beginners can enjoy, making it a wonderful way to embrace those cozy fall vibes.
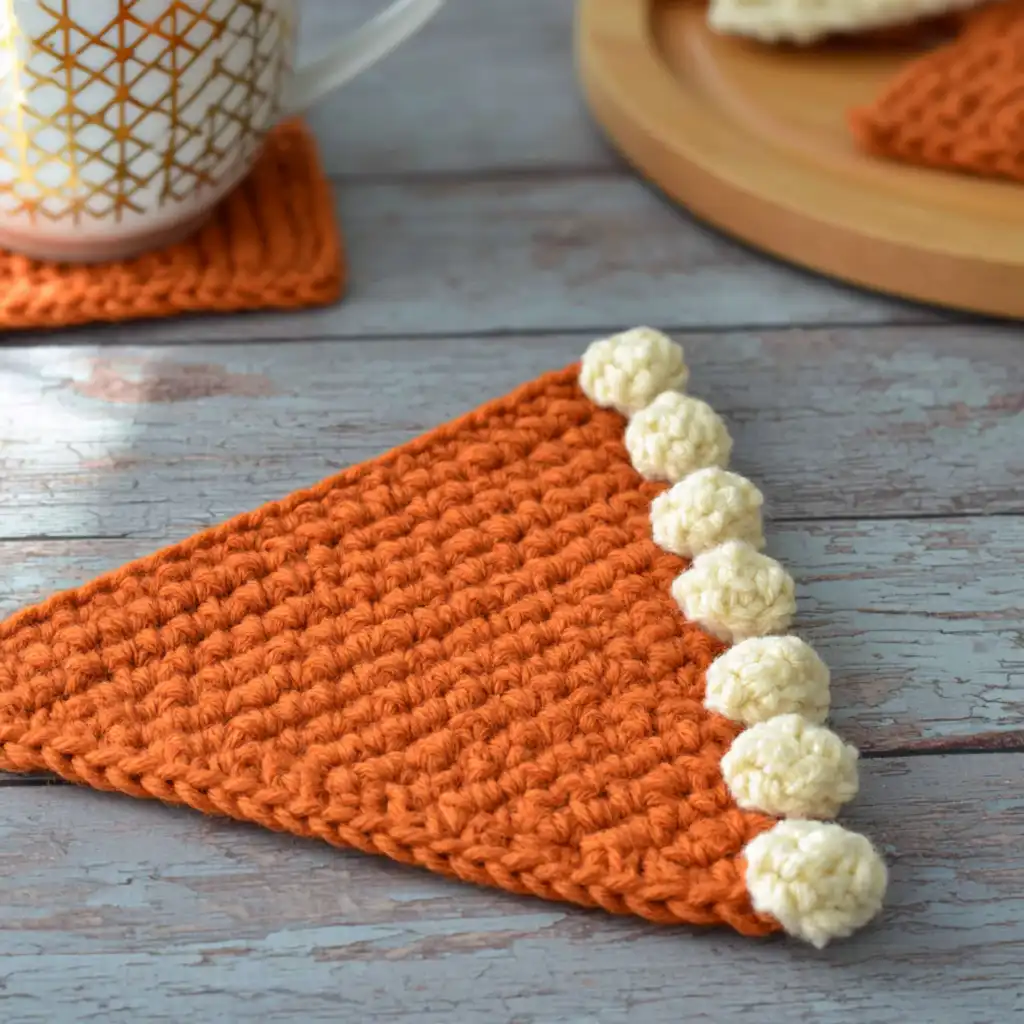
I absolutely adore how these little pie slices turn out. They’re not just charming; they’re also incredibly functional, protecting your surfaces in style. I love making a batch of these for Thanksgiving gatherings or as thoughtful gifts for friends. This pattern is worked in decreasing rows to form the slice, then a border is added, and finally, a lovely cream-colored bobble stitch edging creates that perfect “piped cream” look. It’s a satisfying project that comes together quickly, leaving you with a delightful piece of fall decor.
Pumpkin Pie Slice Coaster Crochet Pattern
Materials
- Yarn: #4 medium (worsted, Afghan, Aran, 10ply) yarn with about 11 wraps per inch (WPI)
- Color A (orange): approximately 15.3 yards (14 meters) per coaster
- Color B (cream): approximately 7.1 yards (6.5 meters) per coaster
Finished Size
Approximately 5 inches (12.7 cm) wide and 5.5 inches (14 cm) high.
Hook and Tools
- 4mm crochet hook
- Scissors
- Yarn Needle
Abbreviations (US Terms)
- ch — chain stitch
- sc — single crochet
- dc — double crochet
- hdc — half double crochet
- col — color
- scdec — single crochet decrease
- bo — bobble stitch
- st/sts — stitch/stitches
- sl st — slip stitch
- sk — skip
- rpt — repeat
- hk — hook
- YO — yarn over
- lp/lps — loop/loops
- [ ] — at the end of a row indicates the number of stitches in that row
Pattern Notes
- This pattern starts with a foundation chain and is worked in decreasing rows until you reach one stitch.
- A border is added around the slice to even out the edges.
- A row of cream-colored bobble stitches is crocheted at the bottom to resemble “piped cream.”
- The project is worked in Color A first, then Color B for the bobble edging.
Gauge
Gauge is not critical for this pattern.
Special Stitches
Single Crochet Decrease (scdec): Insert hook in stitch, YO, pull up loop (2 loops on hook), insert hook in next stitch, YO, pull up loop (3 loops on hook), YO, pull through all 3 loops on hook.
Bobble Stitch (bo): YO, insert hook into specified stitch, YO, pull up loop (3 loops on hook), YO, pull through 2 loops (2 loops on hook), YO, insert hook into same stitch, YO, pull up loop (4 loops on hook), YO, pull through 2 loops (3 loops on hook), YO, insert hook into same stitch, YO, pull up loop (5 loops on hook), YO, pull through 2 loops (4 loops on hook), YO, insert hook into same stitch, YO, pull up loop (6 loops on hook), YO, pull through 2 loops (5 loops on hook), YO, insert hook into same stitch, YO, pull up loop (7 loops on hook), YO, pull through 2 loops (6 loops on hook), YO, pull through all 6 loops on hook.
Instructions
Pumpkin Pie Slice (Color A)
Row 1: Using Color A, ch 17, 1 sc in 2nd ch from hk, 1 sc in next 15 sts, turn. [16 sts]
Row 2: scdec, 1 sc in next 14 sts, turn. [15 sts]
Row 3: scdec, 1 sc in next 13 sts, turn. [14 sts]
Row 4: scdec, 1 sc in next 12 sts, turn. [13 sts]
Row 5: scdec, 1 sc in next 11 sts, turn. [12 sts]
Row 6: scdec, 1 sc in next 10 sts, turn. [11 sts]
Row 7: scdec, 1 sc in next 9 sts, turn. [10 sts]
Row 8: scdec, 1 sc in next 8 sts, turn. [9 sts]
Row 9: scdec, 1 sc in next 7 sts, turn. [8 sts]
Row 10: scdec, 1 sc in next 6 sts, turn. [7 sts]
Row 11: scdec, 1 sc in next 5 sts, turn. [6 sts]
Row 12: scdec, 1 sc in next 4 sts, turn. [5 sts]
Row 13: scdec, 1 sc in next 3 sts, turn. [4 sts]
Row 14: scdec, 1 sc in next 2 sts, turn. [3 sts]
Row 15: scdec, 1 sc in next 1 st, turn. [2 sts]
Row 16: scdec, ch 1. [1 st]
Border (Color A)
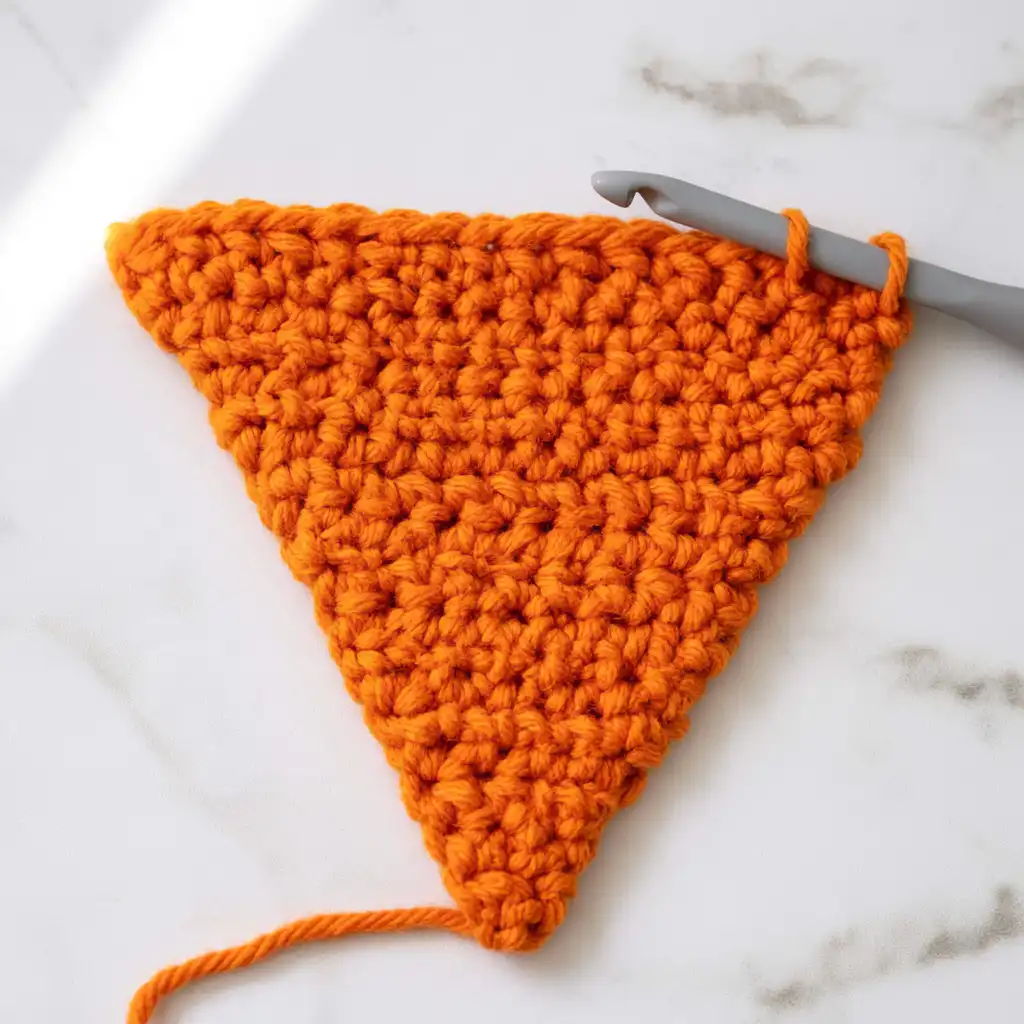
Row 17: Turn the piece to the left and make 15 sc down the left side of the slice. Ch 1 when you get to the corner. Make 16 sc along the top (across the foundation ch). Ch 1 when you get to the next corner. Make 15 sc down the other side. Ch 1, sl st into 1st sc to join.
Finishing
Cut yarn, fasten off, and weave in ends for Color A.
Bobble Stitch Edging (Color B)
Row 18: Using Color B, slip knot yarn to hook. Sl st yarn into ch-1 sp on the top of the slice (the foundation row). Ch 3, (bo, ch 1) in the same sp as ch-3. Sl st into next st. * (Sl st, ch 3, bo, ch 1) in next st, sl st into next st. Repeat from * 7 times. [8 bo sts]
Finishing
Cut yarn, fasten off, and weave in ends for Color B. Adjust the bobble stitches along the top by gently pushing them up from the back to give them a better-rounded shape.
Olivia’s Tips
- Yarn Choice: For coasters, I always recommend using cotton yarn or a cotton blend. It’s durable, absorbent, and easy to clean, which is perfect for items that will see a lot of use and moisture.
- Tension is Key: Maintaining consistent tension throughout your project will ensure your coaster lies flat and has a neat, even appearance.
- Making a Set: These coasters are so quick to make that it’s easy to whip up a whole set for your dining table. They make a lovely coordinated look for any fall gathering!
- Color Play: Don’t be afraid to experiment with colors! While traditional orange and cream are classic, you could try spiced tones like cinnamon or mustard yellow for a unique twist.
- Blocking: Although not strictly necessary for this pattern, a light block can help your coaster achieve a perfectly flat and polished finish.