
There’s something truly special about the autumn season, isn’t there? The crisp air, the changing leaves, and of course, all things pumpkin! Instead of just enjoying pumpkin spice lattes, why not immerse yourself in the spirit of fall by crocheting your very own adorable Pumpkin Beanie? This project is such a joy to make, and it’s perfect for anyone looking for a fun, beginner-friendly pattern.
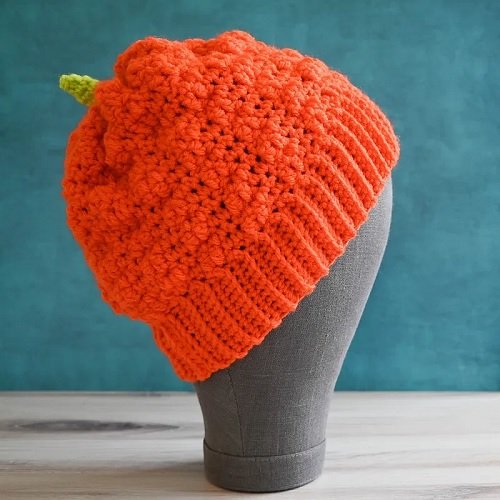
I absolutely love how this beanie captures the cozy essence of autumn. It’s worked from the bottom up, starting with a comfortable hat band and finishing with a cute little stem at the crown. What makes this pattern extra special is that it comes in 10 different sizes, from newborn all the way up to adult large! Imagine making matching beanies for the whole family – they’d be perfect for fall outings, Halloween costumes, or even Thanksgiving celebrations. You can easily customize it with different shades of orange or white for the pumpkin, and brown or green for the stem to make it truly your own.
Pumpkin Beanie Crochet Pattern
Materials
- Big Twist Value yarn (100% acrylic, 6 oz/170 g/380 yd/347 m) – 1 skein each in Orange (CA) and Slime (CB), or approximately the following yardage in CA:
- Newborn: 85 yd (78 m)
- 0-3 Months: 100 yd (91.5 m)
- 3-6 Months: 115 yd (105 m)
- 6-12 Months: 135 yd (123.5 m)
- Toddler: 145 yd (132.5 m)
- Child Small: 165 yd (151 m)
- Child Large: 190 yd (174 m)
- Teen/Adult Small: 205 yd (187.5 m)
- Adult Medium: 230 yd (210.5 m)
- Adult Large: 250 yd (228.5 m)
- US Size H-8/5 mm crochet hook, or any size needed to obtain correct gauge.
- US Size I-9/5.5 mm crochet hook, or any size needed to obtain correct gauge.
- Locking stitch marker.
- Yarn needle.
Finished Sizes
- Newborn: 12” (30.5 cm) hat circumference x 5” (13 cm) height.
- 0-3 Months: 14” (35.5 cm) hat circumference x 5.25” (13.5 cm) height.
- 3-6 Months: 15” (38 cm) hat circumference x 5.5” (14 cm) height.
- 6-12 Months: 16” (40.5 cm) hat circumference x 6” (15 cm) height.
- Toddler: 17” (43 cm) hat circumference x 6.25” (16 cm) height.
- Child Small: 18” (45.5 cm) hat circumference x 6.75” (17 cm) height.
- Child Large: 19” (48.5 cm) hat circumference x 7.25” (18.5 cm) height.
- Teen/Adult Small: 20” (51 cm) hat circumference x 7.5” (19 cm) height.
- Adult Medium: 21” (53.5 cm) hat circumference x 8” (20.5 cm) height.
- Adult Large: 22” (56 cm) hat circumference x 8.25” (21 cm) height.
Yarn Information
The pattern uses Big Twist Value yarn, which is 100% acrylic. Approximate yardage for Color A (CA) is provided per size, and 10 yards (9 m) of Color B (CB) is needed for all sizes. Any medium weight yarn can be substituted.
Hook and Tools
- Smaller Hook: US Size H-8/5 mm crochet hook
- Larger Hook: US Size I-9/5.5 mm crochet hook
- Locking stitch marker
- Yarn needle
Abbreviations
- BL – back loop only
- CA – Color A
- CB – Color B
- ch – chain
- dc – double crochet
- invdec – invisible decrease – Insert hook in front loop only of each of next 2 sts, yo and draw up a loop, yo and draw through 2 loops.
- RS – right (front) side
- sc – single crochet
- sl st – slip stitch
- st(s) – stitch(es)
- WS – wrong side
- yo – yarn over
- [] Repeat instructions between brackets as indicated.
Pattern Notes
- Ch 1 at start and sl st at end of Rows and Rounds DO NOT count as stitches.
- The hat is worked from the bottom up, starting with the hat band.
Gauge
- 10 scBL = 2.5” (6.5 cm) across with smaller hook. Exact gauge is not critical for Hat Band.
- 14 sts = 4” (10 cm) in pattern for Work Even with larger hook. For best results, always check your gauge.
Instructions
Hat Band (All Sizes)
To Begin: With CA and smaller hook, ch 7 (7, 7, 7, 7, 9, 9, 11, 11, 11).
Row 1: Turn, skip 1 ch, sc in next ch and each ch across. 6 (6, 6, 6, 6, 8, 8, 10, 10, 10) sts
Row 2: Turn, ch 1, scBL in first st and each st across.
Repeat Row 2 until Hat Band measures approximately 12” (14”, 15”, 16”, 17”, 18”, 19”, 20”, 21”, 22”)/30.5 cm (35.5 cm, 38 cm, 40.5 cm, 43 cm, 45.5 cm, 48.5 cm, 51 cm, 53.5 cm, 56 cm) long. Do not fasten off.
Fold Hat Band over lengthwise so that short edges are together, being careful not to twist. Join with slip stitch seam across short edge. Do not fasten off.
Work Even (All Sizes)
Set Up Round: (RS) Ch 1, evenly work 44 (48, 56, 56, 60, 64, 68, 72, 76, 80) sc along the long edge. 44 (48, 56, 56, 60, 64, 68, 72, 76, 80) sts
Round 1: (RS) Change to larger hook, ch 1, starting in first st [dc in next 2 sts, sc in next 2 sts] around, join with sl st to first dc.
Round 2: Turn to WS, ch 1, [sc in next 2 sc, dc in next 2 dc] around, join with sl st to first sc.
Round 3: Turn to RS, ch 1, [dc in next 2 dc, sc in next 2 sc] around, join with sl st to first dc.
Repeat Rounds 2-3 until hat measures approximately 5” (5.25”, 5.5”, 6”, 6.25”, 6.75”, 7.25”, 7.5”, 8”, 8.25”)/13 cm (13.5 cm, 14 cm, 15 cm, 16 cm, 17 cm, 18.5 cm, 19 cm, 20.5 cm, 21 cm) height, ending after either Round.
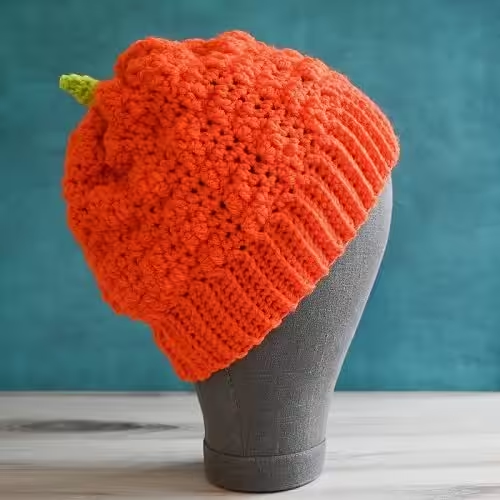
Fasten off CA with long yarn tail (approximately 18”/45.5 cm long). Thread yarn needle with long yarn tail and cinch final round closed by weaving yarn needle through each stitch on bottom edge. Slowly tighten yarn tail to pull top closed until approximately 1” (2.5 cm) diameter is still open. DO NOT seam the top closed.
Stem (All Sizes)
Round 1: Join CB to any st on top opening of hat with RS facing, ch 1, evenly work 12 sc along the opening at top of hat, place stitch marker in last st to mark position. Move up stitch marker each round. (12 sts)
Round 2: Sc in each st around. (12 sts)
Round 3: [Invdec, sc in next st] around. (8 sts)
Rounds 4-6: Repeat Round 2, 3 times. (8 sts)
Round 7: Invdec around. (4 sts)
Fasten off CB with long yarn tail (approximately 12”/30.5 cm long).
Finishing
Thread yarn needle with CB, seam top of Stem with whipstitch seam. With yarn needle, weave in ends on inside of hat.
Olivia’s Tips
This Pumpkin Beanie is such a delightful project, and here are a few tips to make your crocheting experience even smoother:
- Don’t skip the gauge swatch! Especially for the main body of the hat, checking your gauge with the larger hook will ensure your beanie turns out the correct size. While the hat band gauge isn’t critical, the main hat body’s fit depends on it.
- Use a stitch marker for the stem: The stem is worked in continuous rounds, so placing a stitch marker in the first stitch of each round and moving it up helps you keep track of where your rounds begin and end.
- Color choices: While orange and green are classic pumpkin colors, don’t be afraid to experiment! A cream or white pumpkin with a brown stem could be lovely, or even a deep red for a unique look.
- Weave in ends carefully: A well-finished project always looks more professional. Take your time to weave in all yarn tails securely with your yarn needle. This will also help the beanie hold up better through wear and washing.
- Gift-giving: These beanies make fantastic gifts for fall birthdays, baby showers, or as a thoughtful handmade present for friends and family. Since there are so many sizes, you can truly make one for everyone!
Frequently Asked Questions
Here are some common questions about this crochet pumpkin beanie pattern: