
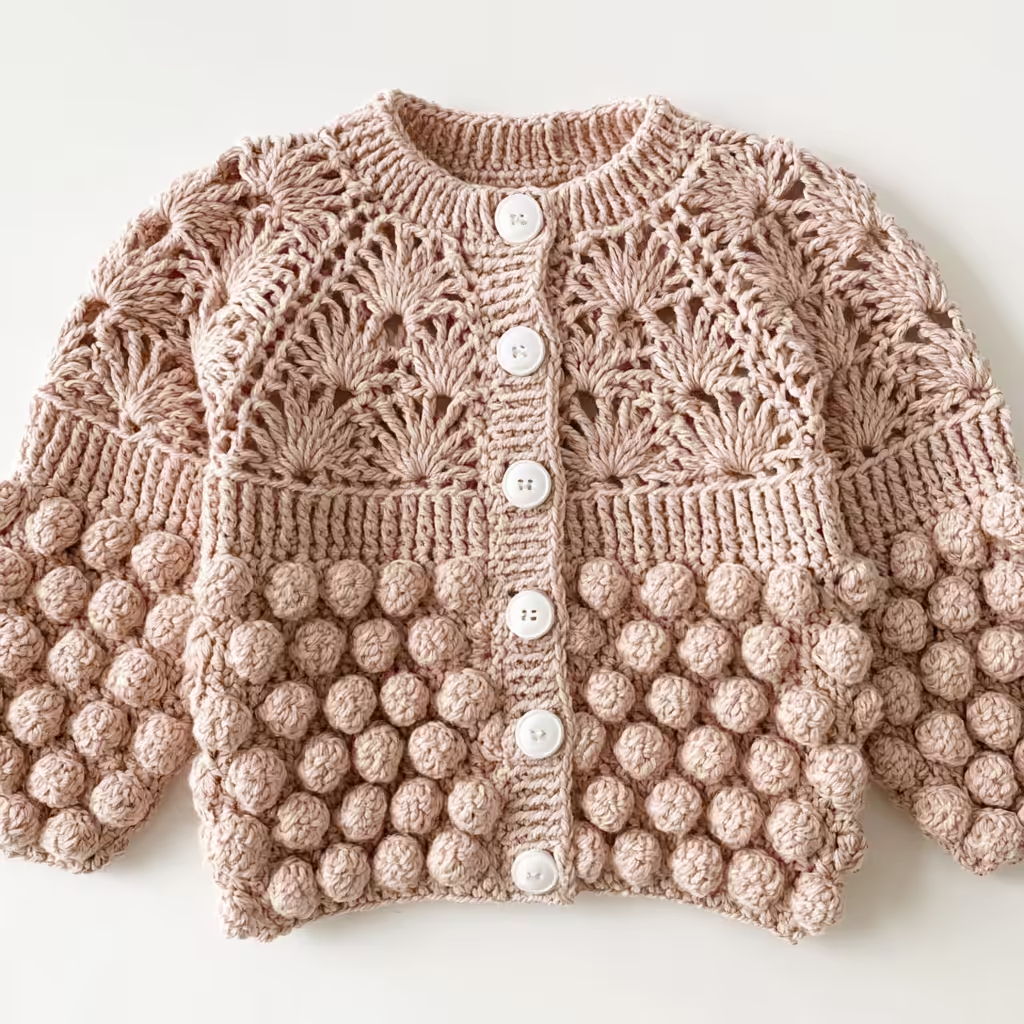
There’s something incredibly special about crocheting for little ones, and this blush pink bobble baby cardigan is one of my favorite projects to make! It combines two beautiful textures: a delicate lace yoke with elegant fan stitches and a cozy, richly textured bobble stitch body and sleeves. The contrast is just delightful, making it a truly eye-catching piece that’s also wonderfully soft for a baby.
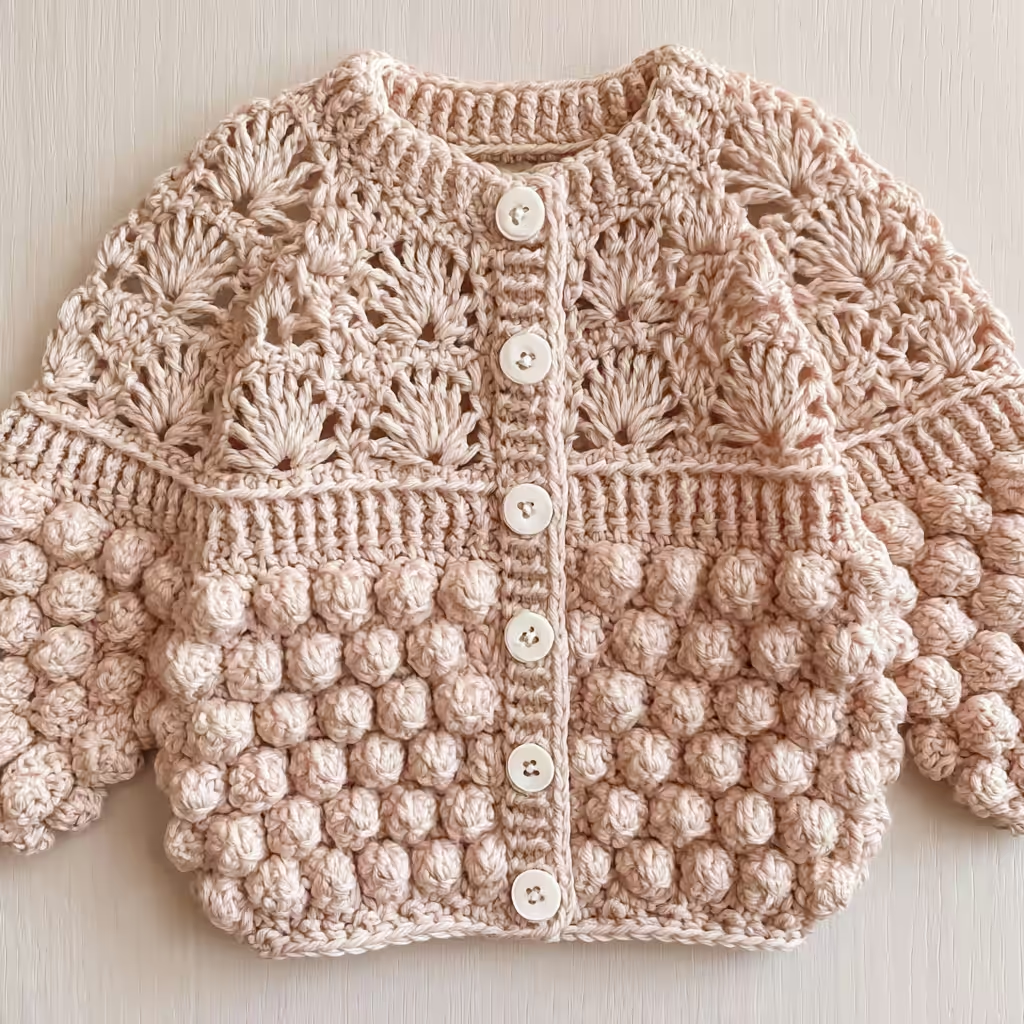
What I particularly love about this pattern is its top-down construction. Starting from the neckband and working down to the hem means you can easily check the fit as you go, ensuring it’s just right for your little one. It’s an intermediate-level project that’s incredibly rewarding, and the detailed instructions will guide you through every step to create a beautiful, handmade garment.
Blush Pink Bobble Baby Cardigan Crochet Pattern
Finished Size
- Chest circumference: approximately 19 inches / 48 cm (blocked)
- Length from shoulder to hem: approximately 10.5 inches / 27 cm
- Sleeve length: approximately 7 inches / 18 cm
- Yoke depth: approximately 3.5 inches / 9 cm
Yarn Information
- Yarn Weight: DK weight yarn (CYCA #3 Light)
- Yardage: Approximately 400 to 450 yards / 366 to 412 meters total
- Color: One color throughout (blush pink shown)
- Suggested Yarns:
- Paintbox Yarns Simply DK (100% acrylic, 276 yd per 100 g skein) – purchase 2 skeins
- Drops Safran (100% cotton, 175 yd per 50 g skein) – purchase 3 skeins
- Rowan Baby Merino Silk DK (66% merino wool, 34% silk, 148 yd per 50 g skein) – purchase 3 skeins
Hook and Tools
- US size E-4 / 3.5 mm hook (for main fabric)
- US size D-3 / 3.25 mm hook (for ribbing and button band)
- 5 pearl shank buttons, 12 mm diameter
- Yarn needle
- 6 to 8 locking stitch markers
- Scissors
Abbreviations
- ch — chain
- sl st — slip stitch (insert hook, yarn over, pull through both loops)
- sc — single crochet (insert hook, yarn over, pull up loop, yarn over, pull through both loops)
- hdc — half double crochet
- dc — double crochet (yarn over, insert hook, pull up loop, yarn over, pull through 2 loops, yarn over, pull through remaining 2 loops)
- tr — treble crochet
- st(s) — stitch(es)
- sp(s) — space(s)
- RS — right side (the side that faces out when worn)
- WS — wrong side (the inside)
- yo — yarn over
- rep — repeat
- pm — place marker
- rm — remove marker
- sk — skip
- blo — back loop only
- inc — increase (2 sc in same st)
- dec — decrease (sc2tog)
- bo — bobble stitch
- fan — fan stitch
- t-ch — turning chain
- rnd(s) — round(s)
Pattern Notes
- The cardigan is worked top down. The yoke is worked flat (turning rows) to create the front opening for the button band. The body and sleeves are subsequently worked in joined rounds.
- The lace yoke uses a fan and chain-space structure. Read each row carefully, as the fan alignment shifts between right-side and wrong-side rows.
- The turning chain at the beginning of each row counts as indicated in the instructions. Where a t-ch does NOT count as a stitch, this is explicitly noted.
- Stitch counts given at the end of each row or round are the total working stitches including any chain spaces that serve as stitches.
- Sleeve stitches are placed on holders when separating for body, then rejoined later.
- Block the finished cardigan before sewing on buttons for best results.
Gauge
- Main stitch pattern (bobble rows) with E-4 / 3.5 mm hook: 16 stitches x 10 rows = 4 inches / 10 cm, blocked
- Lace yoke with E-4 / 3.5 mm hook: 18 stitches x 9 rows = 4 inches / 10 cm, blocked
Special Stitches
Practice these special techniques on a swatch first if they are new to you.
Bobble Stitch (bo)
- Yarn over, insert hook into indicated stitch.
- Yarn over, pull up a loop.
- Yarn over, pull through first 2 loops on hook (you now have 1 incomplete double crochet on your hook).
- Repeat steps 1 through 3 four more times in the SAME stitch (you will have 6 loops on hook total).
- Yarn over and pull through all 6 loops on hook.
- Chain 1 to close and lock the bobble (this ch-1 counts as a stitch).
Important: Bobbles are always worked on wrong side rows so they pop out on the right side of the fabric.
Fan Stitch (fan)
In the indicated stitch or space, work (2 dc, ch 1, 2 dc, ch 1, 2 dc). This creates a 3-cluster fan with 2 chain spaces. Total: 6 dc + 2 ch-1 spaces within a single insertion point.
Ribbing Stitch
Single crochet in back loop only throughout all ribbing sections. This creates a stretchy, knit-like rib texture.
SC2TOG (Single Crochet Decrease)
- Insert hook into next stitch, yarn over, pull up a loop (2 loops on hook).
- Insert hook into following stitch, yarn over, pull up a loop (3 loops on hook).
- Yarn over and pull through all 3 loops.
Instructions
Section 1: Neckband
To Begin: With smaller hook (D-3 / 3.25 mm), chain 7.
Foundation Row (WS): Sc in 2nd ch from hook and in each ch across. Turn. (6 sc)
Neckband Rows 2 through 66: Ch 1 (does NOT count as st), sc in blo of each st across. Turn. (6 sc)
After 66 rows, the neckband strip measures approximately 13 inches / 33 cm. Do not fasten off.
Rotate the neckband strip 90 degrees to work along the long edge. The long edge will become the neckline pickup row.
Section 2: Yoke Setup Row
Switch to larger hook (E-4 / 3.5 mm).
Yoke Setup Row (RS): Working along the long edge of the neckband, sc evenly along the edge to produce 66 sc total. Turn. (66 sc)
Work approximately 1 sc per row-end of the neckband. Adjust spacing as needed to achieve 66 sts exactly.
Section 3: Yoke Lace Pattern
The yoke is worked flat for approximately 3.5 inches / 9 cm. The lace pattern expands from 66 sts to 126 sts over 4 increase rows.
Yoke Row 1 (WS): Ch 3 (counts as dc here and throughout yoke), dc in next st, ch 1, sk 1, (2 dc in next st, ch 1, sk 1) across, dc in last st. Turn. (66 working units)
Yoke Row 2 (RS, Increase Row): Ch 4 (counts as dc + ch 1), sk first ch-sp, (fan in next ch-sp, ch 1, sk next ch-sp) across, dc in top of t-ch. Turn. (86 working sts)
Yoke Row 3 (WS): Ch 1 (does NOT count as st), sc in first st, ch 3, sk 2, (sc in ch-1 sp of fan, ch 3, sk 2, sc between fans, ch 3, sk 2) across, sc in last st. Turn. (86 working units)
Yoke Row 4 (RS): Ch 3 (counts as dc), 2 dc in first ch-3 sp, (ch 1, sc in next sc, ch 1, fan in next ch-3 sp) across, ending with 3 dc in last ch-3 sp, dc in last sc. Turn. (86 working units)
Yoke Row 5 (WS): Ch 1, sc in first dc, ch 2, (sc in next ch-1 sp, ch 2, sc in center of fan, ch 2, sc in next ch-1 sp, ch 2) across, sc in top of t-ch. Turn. (86 working units)
Yoke Row 6 (RS, Increase Row): Ch 3, dc in first ch-2 sp, (fan in next sc, sk ch-2 sp, dc in next sc, sk ch-2 sp) across, ending with 2 dc in last ch-2 sp, dc in last sc. Turn. (106 working sts)
Yoke Row 7 (WS): Ch 1, sc in first st, (ch 3, sk 2, sc in next st) across. Turn. (106 working units)
Yoke Row 8 (RS): Ch 3, 2 dc in first ch-3 sp, (ch 1, 3 dc in next ch-3 sp) across, dc in last sc. Turn. (106 working sts)
Yoke Row 9 (WS): Ch 1, sc in first st, ch 2, (sc in next ch-1 sp, ch 2) across, sc in last st. Turn. (106 working units)
Yoke Row 10 (RS, Increase Row): Ch 3, (2 dc in each ch-2 sp, ch 1) across, dc in last sc. Turn. (116 working sts)
Yoke Row 11 (WS): Ch 1, sc in each st and ch-1 sp across. Turn. (116 sc)
Yoke Row 12 (RS, Increase Row): Ch 1, sc in first st, (sc in next 4 sts, 2 sc in next st) 23 times, sc in last st. Turn. (126 sc)
Section 4: Sleeve Separation and Body Join
Divide the 126 sts as follows:
- Left Front: 20 sts
- Left Sleeve: 22 sts (place marker after st 42)
- Back: 42 sts (place marker after st 84)
- Right Sleeve: 22 sts (place marker after st 106)
- Right Front: 20 sts
Separation Row: Work across Left Front 20 sts, chain 4 (underarm chain), skip Left Sleeve 22 sts (place these on a stitch holder), work across Back 42 sts, chain 4, skip Right Sleeve 22 sts (place on holder), work across Right Front 20 sts. Turn.
Body stitch count: 20 + 4 + 42 + 4 + 20 = 90 sts.
The body continues worked flat to keep the front open for the button band.
Section 5: Body Bobble Section
Body Row 1 (WS, Bobble Setup): Ch 1 (does NOT count as st), sc in each st across, working sc in each of the 4 underarm chains on each side. Turn. (90 sc)
Body Row 2 (RS): Ch 1, sc in each st across. Turn. (90 sc)
Body Row 3 (WS, Bobble Row): Ch 1, sc in first st, (bo in next st, sc in next st) 44 times, sc in last st. Turn. (90 sts)
Body Row 4 (RS): Ch 1, sc in each st across. Turn. (90 sc)
Body Row 5 (WS, Bobble Row, offset): Ch 1, sc in first 2 sts, (sc in next st, bo in next st) 43 times, sc in last 3 sts. Turn. (90 sts)
Body Row 6 (RS): Ch 1, sc in each st across. Turn. (90 sc)
Repeat Body Rows 3 through 6 until body measures approximately 6.5 inches / 16.5 cm from the underarm separation row, ending with a RS row.
Section 6: Body Hem Ribbing
Switch to smaller hook (D-3 / 3.25 mm).
Hem Row 1 (WS): Ch 1, sc in blo of each st across. Turn. (90 sc)
Hem Row 2 (RS): Ch 1, sc in blo of each st across. Turn. (90 sc)
Repeat Hem Rows 1 and 2 for 8 total rows (approximately 1 inch / 2.5 cm of ribbing).
Fasten off.
Section 7: Sleeve Construction
Reattach yarn to the 22 held sleeve sts at the underarm. Join round: With RS facing, join yarn with sl st to the first held sleeve st.
Sleeve Round 1 (RS): Ch 1, sc in each of the 22 held sleeve sts, then sc in each of the 4 underarm chain sts, sl st to join. (26 sc)
Sleeve Round 2 (RS): Ch 1, sc in each st around, sl st to join. (26 sc)
Sleeve Bobble Round (RS): Ch 1, (bo in next st, sc in next st) around, sl st to join. (26 sts)
Sleeve Plain Round: Ch 1, sc in each st around, sl st to join. (26 sc)
Sleeve Offset Bobble Round: Ch 1, sc in first st, (bo in next st, sc in next st) around to last st, bo in last st, sl st to join. (26 sts)
Sleeve Plain Round: Ch 1, sc in each st around, sl st to join. (26 sc)
Repeat the 4-round bobble sequence until sleeve measures approximately 6 inches / 15 cm from underarm.
Decrease Round 1: Ch 1, sc2tog, sc in each st to last 2 sts, sc2tog, sl st to join. (24 sc)
Decrease Round 2: Ch 1, sc in each st around, sl st to join. (24 sc)
Section 8: Sleeve Cuff Ribbing
Switch to smaller hook (D-3 / 3.25 mm).
Cuff Round 1: Ch 1, sc in blo of each st around, sl st to join. (24 sc)
Repeat for 8 rounds total.
Fasten off.
Repeat Sections 7 and 8 for second sleeve.
Section 9: Button Band (Right Front, Buttonhole Side)
With smaller hook and RS facing, join yarn at bottom right-hand corner of right front edge.
Pick up approximately 54 sc along the right front edge from hem to neckband. Turn.
Band Row 1 (WS): Ch 1, sc in blo of each st across. Turn. (54 sc)
Band Row 2 (RS, Buttonhole Row): Ch 1, sc in first 3 sts, (ch 2, sk 2 sts, sc in next 7 sts) 4 times, ch 2, sk 2, sc in last 3 sts. Turn. (54 working sts)
Band Row 3 (WS): Ch 1, sc in blo of each sc across and 2 sc in each ch-2 sp. Turn. (54 sc)
Band Row 4 (RS): Ch 1, sc in blo of each st across. Turn. (54 sc)
Fasten off.
Section 10: Button Band (Left Front, Plain Side)
With smaller hook and RS facing, join yarn at top left-hand corner of left front edge.
Pick up 54 sc working downward. Turn.
Band Rows 1 through 4: Ch 1, sc in blo of each st across. Turn. (54 sc each row)
Fasten off.
Finishing
Weave in all remaining ends using a yarn needle.
Sew pearl shank buttons to the left front band, aligning with the 5 buttonholes on the right band. Position the first button at the top directly below the neckband, and the last button approximately 0.5 in / 1.25 cm above the hem ribbing. Space the remaining 3 buttons evenly between.
Olivia’s Tips
This cardigan truly shines with the right yarn! Choosing a yarn with good stitch definition, as mentioned in the pattern, is key to making those beautiful bobbles and delicate lace pop. Fuzzy or bouclé yarns might hide all your hard work, so opt for something smoother to really showcase the textures. Also, don’t skip the blocking step! It makes a huge difference in opening up the lace and evening out the bobbles, giving your finished cardigan a professional, polished look. And remember, working top-down means you can regularly hold it up to your little one (or a similar-sized garment) to check the fit, which is so helpful for baby items!
Size Customization Tips
- Newborn (up to 3 months): Neckband 56 rows, yoke starts at 56 sts, body 78 sts, sleeve 22 sts
- 12 to 18 months: Neckband 74 rows, yoke starts at 74 sts, body 100 sts, sleeve 28 sts
- 18 to 24 months: Neckband 80 rows, yoke starts at 80 sts, body 108 sts, sleeve 30 sts
Keep body and sleeve stitch counts even for the bobble pattern to work correctly. Fan stitch repeat in the lace yoke is 10-st based, so adjust yoke setup sts in multiples of 10.
Care Instructions
- Hand wash in cool water with gentle detergent.
- Do not wring.
- Lay flat to dry away from direct sunlight or heat.
- Do not tumble dry.
- Store folded, not hung, to preserve the shape.