
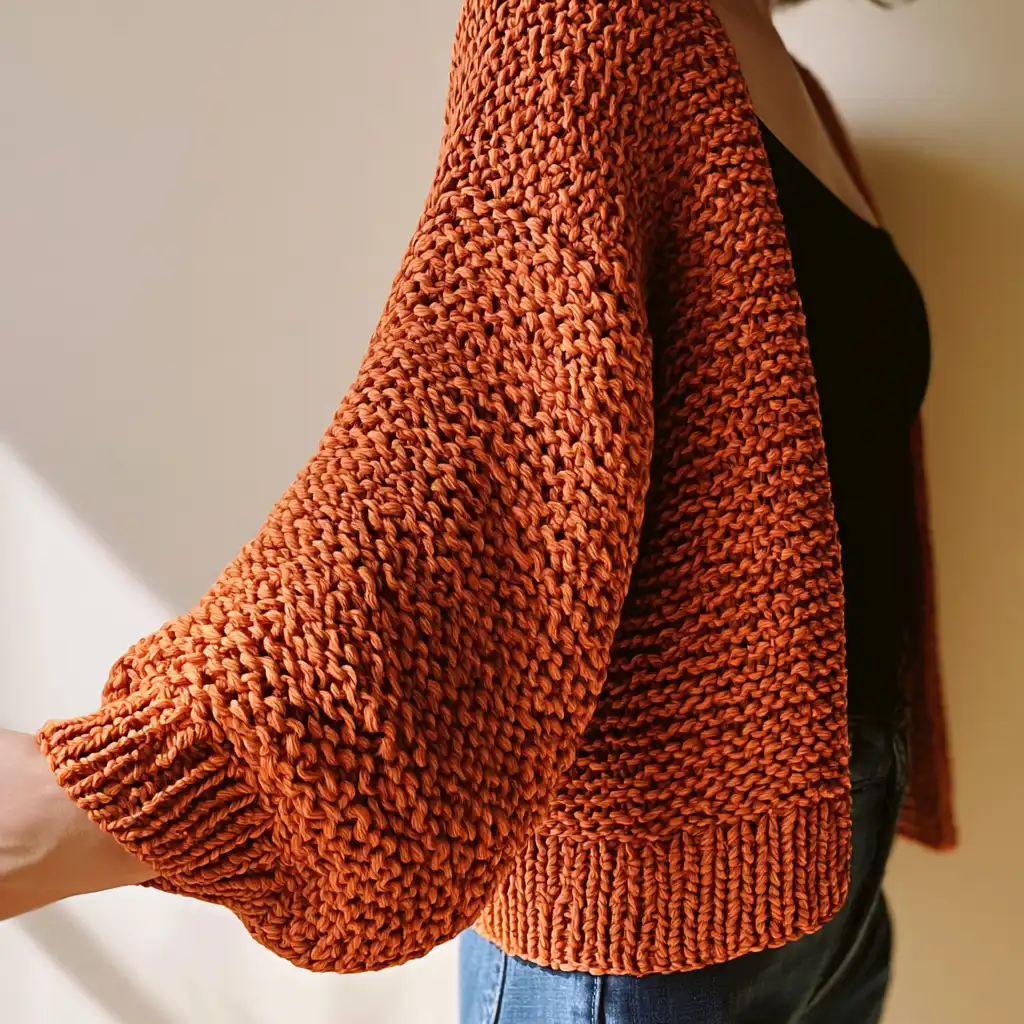
There’s nothing quite like wrapping yourself in a warm, handmade garment, especially when it knits up quickly! Today, I’m excited to share a fantastic project for a cozy bomber-style cardigan I call the Cloud Cardi. It features lovely puffy sleeves and a slightly cropped body, making it a stylish and comfortable addition to any wardrobe. I find it pairs beautifully with high-waisted jeans or a skirt, and it’s perfect for those relaxed days at home.

This project is actually a knit pattern, worked in pieces on big, chunky needles, which means it comes together surprisingly fast. It’s a wonderful choice for those who are new to knitting garments or anyone looking for a satisfying project that yields quick results. The instructions are clear and simple, and there’s no complicated shaping to worry about. If you’re ready to create a super snuggly cardigan, grab your needles and let’s get started!
Cloud Cardi Knit Pattern
Materials
- Yarn: Any 20ply / Super Bulky weight yarn. Pictured here: Super Woolly (100m/200g) in color Rust Bucket.
- Needles: 7.00mm and 10.00mm 80cm circular needles (or extra long straight needles)
- Large darning needle
Finished Size
This pattern is available in sizes XXS (XS, S, SM, M, L, XL, XXL).
- To Fit Bust: 68 (74, 80, 86, 94, 103, 110, 118) cm / 27 (29, 31.5, 34, 37, 40, 43, 46) inches
- Finished Bust: 82 (88, 94, 100, 108, 117, 124, 132) cm / 32 (34.5, 37, 39.5, 43, 46, 49, 52) inches (measured as the full circumference around the body, including the open-front gap, designed to fit with between 10–16cm / 4–6” of positive ease).
Pictured in size SM, worn on a 90cm bust with 10cm positive ease.
Yarn Information
- Yarn Weight: 20ply / Super Bulky
- Brand Used: Super Woolly
- Color Used: Rust Bucket
- Meterage: Approximately 376 (436, 497, 543, 632, 708, 773, 860) meters
Hook and Tools
- Needles: 7.00mm and 10.00mm 80cm circular needles (or extra long straight needles)
- Large darning needle
Abbreviations
- k — knit
- k2tog — knit two together, a common decrease
- p — purl
- sts — stitches
- R1 — row 1
- RS — right side
- WS — wrong side
Pattern Notes
- Adjust needle size as necessary to match pattern gauge.
- A Long-Tail Cast On is recommended, but you may use your preferred method.
- The finished length of the cardigan can be adjusted; now is the perfect time to change the length for the back and front panels.
- When attaching sleeves, you may need to stretch and ease the sleeve to fit while sewing.
- Blocking involves soaking your knit in water, then drying it flat.
Gauge
8 sts to 10cm in garter stitch on larger needles.
Instructions
Back
Using smaller needles, cast on: 35 (39, 41, 43, 47, 49, 53, 55) sts.
R1 (WS): p2, [k1, p1] to last st, p1
R2 (RS): k2, [p1, k1] to last st, k1
Repeat these two rows until ribbing measures 6cm from cast on.
Change to 10mm needles.
Next row: Knit to end.
Repeat this row until back measures: 42 (45, 49, 53, 57, 61, 65, 69)cm from cast on, or until desired length.
Bind off all stitches.
Front — Make 2
Using smaller needles, cast on: 13 (15, 17, 17, 19, 21, 21, 23) sts.
R1 (WS): p2, [k1, p1] to last st, p1
R2 (RS): k2, [p1, k1] to last st, k1
Repeat these two rows until ribbing measures 6cm from cast on.
Change to 10mm needles.
Next row: Knit to end.
Repeat this row until the front measures: 42 (45, 49, 53, 57, 61, 65, 69)cm from cast on, or until it matches the back.
Bind off all stitches, and knit the second front the same as the first.
Sleeve — Make 2
Using 10mm needles, cast on: 31 (33, 35, 37, 41, 43, 45, 49) sts.
Next row: Knit to end.
Repeat this row until the sleeve measures: 41 (40, 40, 39, 39, 39, 38, 37)cm from cast on, or until 6cm shorter than desired length.
Decrease for the cuff
Sizes XXS, S, L: k2, k2tog to last stitch, k1.
Sizes XS, SM, M, XL, XXL: k1, k2tog to last st.
17 (17, 19, 19, 21, 23, 23, 25) stitches remain.
Change to smaller needles.
R1 (WS): p2, [k1, p1] to last st, p1
R2 (RS): k2, [p1, k1] to last st, k1
Repeat these two rows until ribbing measures 6cm.
Bind off all stitches, and knit the second sleeve the same as the first.
Finishing
Using mattress stitch and a large darning needle, sew together your cardigan in the following order:
- Shoulders: Sew each Front bind off edge to the Back bind off edge, starting with the outer-most stitches and working into the middle. There will be a gap in the middle of the Back for your neck.
- Sleeves: On the cast on edge of the sleeve, mark the midway point and match it to the new shoulder seam. Next, from the shoulder seam, measure along the body: 19 (21, 22, 23, 26, 27, 28, 31)cm on each side. This is where you want to sew your sleeve to, and may require you to stretch and ease the sleeve to fit whilst sewing.
- Side Seam: Fold your sleeves in half lengthways, and sew all the way along the underside of your sleeve and down the side of the body.
Weave in any loose threads, and give your new cardigan a good blocking if you choose!
Olivia’s Tips
Working with super bulky yarn is such a treat because projects grow so quickly! Don’t be afraid to try on your pieces as you go, especially the sleeves. Pinning the shoulders and then the sleeve to your body can help you visualize the fit and ensure the length is just right before you finish. Achieving a consistent gauge is important for the final fit, so be sure to swatch before you start the main project. If your stitches are too loose or too tight, adjust your needle size accordingly. This pattern is designed for ease, so take your time and enjoy the process of creating something beautiful and cozy!
Pattern Check
Please note that the provided source material is for a knit pattern, not a crochet pattern, despite the blog prompt. The instructions, materials, and abbreviations are all specific to knitting. This article has been written to accurately reflect the provided knitting pattern for the Cloud Cardi.