
There’s nothing quite like a handcrafted accessory to complete your summer look, and this crochet summer hat is a project I’ve truly enjoyed making. When the weather warms up, heavy hats are out, but a stylish, breathable hat is a must-have for sunny days. This pattern delivers exactly that: a lightweight, airy hat with a beautiful openwork structure that keeps you cool while offering just the right amount of shade.
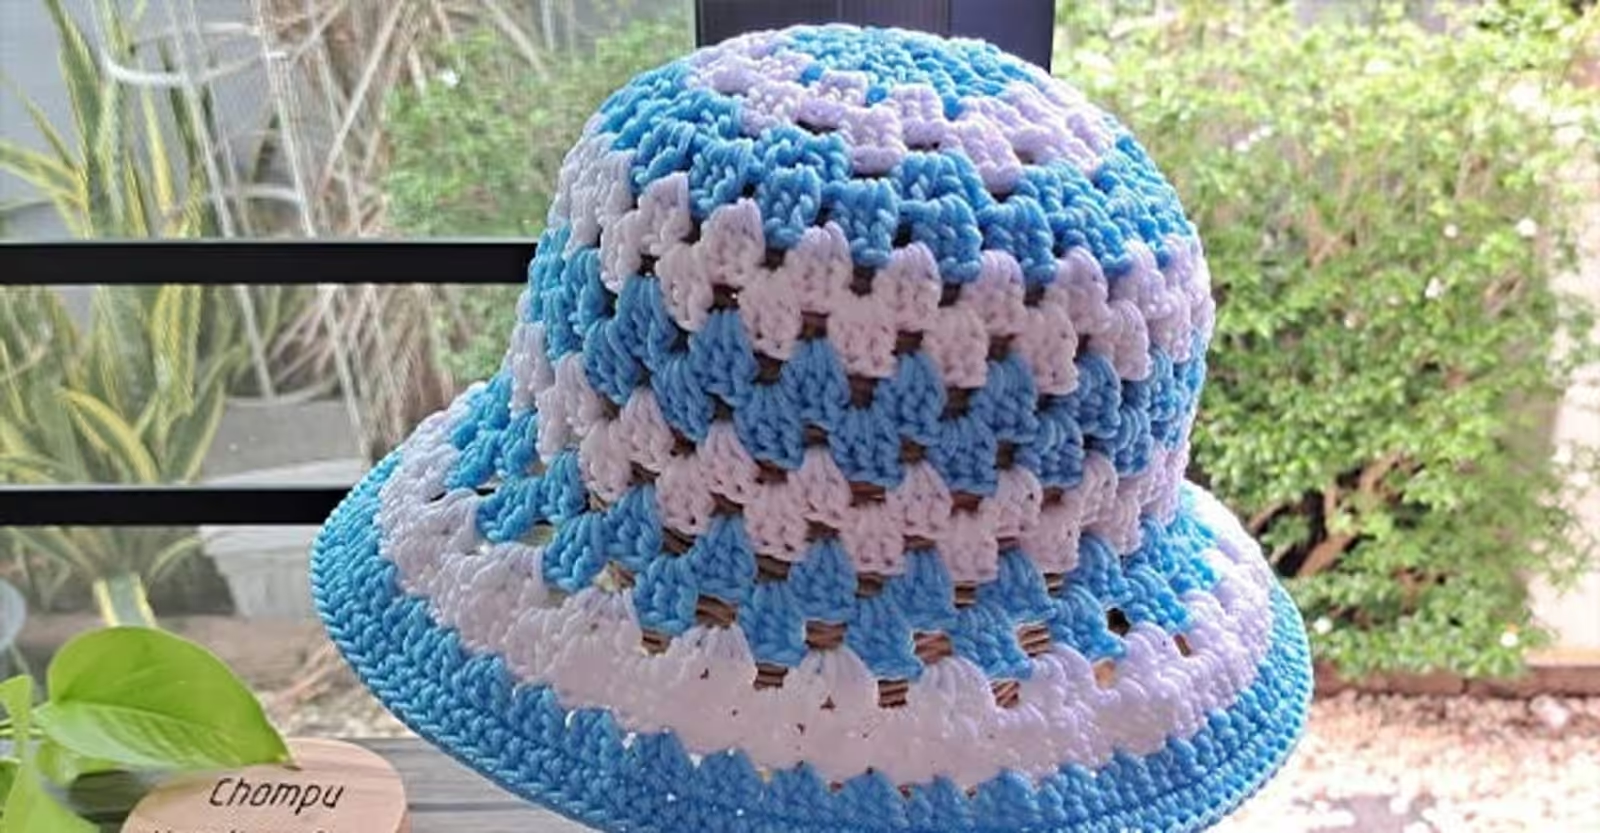
What I love most about this hat is its blend of practicality and charm. It’s perfect for strolling through a farmer’s market, enjoying a picnic, or simply adding a touch of handmade elegance to any outfit. The classic granny stitch clusters create a lovely texture, and the option to alternate colors adds a vibrant, rhythmic design that’s truly eye-catching. Plus, it’s surprisingly beginner-friendly, making it a satisfying project for anyone new to crochet or looking for a relaxing make.
Crochet Summer Hat Crochet Pattern
Materials
- 2.5 mm crochet hook
- Shiny plastic yarn (such as Thai polypropylene rope or milk cotton yarn) in two summery colors (e.g., sky blue and white)
- Scissors
- Yarn needle
- Stitch markers (optional)
Yarn Information
The pattern recommends a shiny plastic yarn like Thai polypropylene rope or milk cotton yarn. The choice of yarn is important for this project, as it needs to hold its shape well while remaining lightweight and breathable. This ensures the hat retains its structure without feeling stiff or heavy.
Hook and Tools
- 2.5 mm crochet hook
- Scissors
- Yarn needle for weaving in ends
- Stitch markers (optional, but useful for marking rounds)
Abbreviations (US Terms)
- ch — chain
- dc — double crochet
- sc — single crochet
- sl st — slip stitch
Pattern Notes
- This hat is worked in the round, starting from the crown.
- The foundation of the hat uses classic granny stitch clusters (groups of three double crochets).
- The chain 3 at the beginning of each round counts as the first double crochet.
- Stitch markers can be used to keep track of your rounds, especially when transitioning between sections.
Instructions
The Crown
The crown of the hat is worked in the round using granny stitch clusters, expanding outwards from a magic ring.
To Begin: Start with a magic ring.
Round 1: Ch 3 (counts as first dc), 2 dc into ring, ch 1, (3 dc into ring, ch 1) repeat 3 more times, sl st to join. If you’re new to magic rings or granny squares, this beginner-friendly flower coaster pattern uses similar techniques!
Round 2: Sl st into the first ch-1 space. Ch 3 (counts as first dc), 2 dc into the same ch-1 space, ch 1. In each subsequent ch-1 space around, work (3 dc, ch 1). Sl st to join.
Continue adding rounds and increasing cluster groups until the crown gently domes. This typically takes 6–8 rounds, depending on your tension and desired head size.
Body of the Hat
Once the crown reaches the desired width, you will shape the body of the hat. This section is worked without increases to create a straight side that drapes over the head.
Continue working in granny stitch (3 dc, ch 1 in each ch-1 space from the previous round) without increasing.
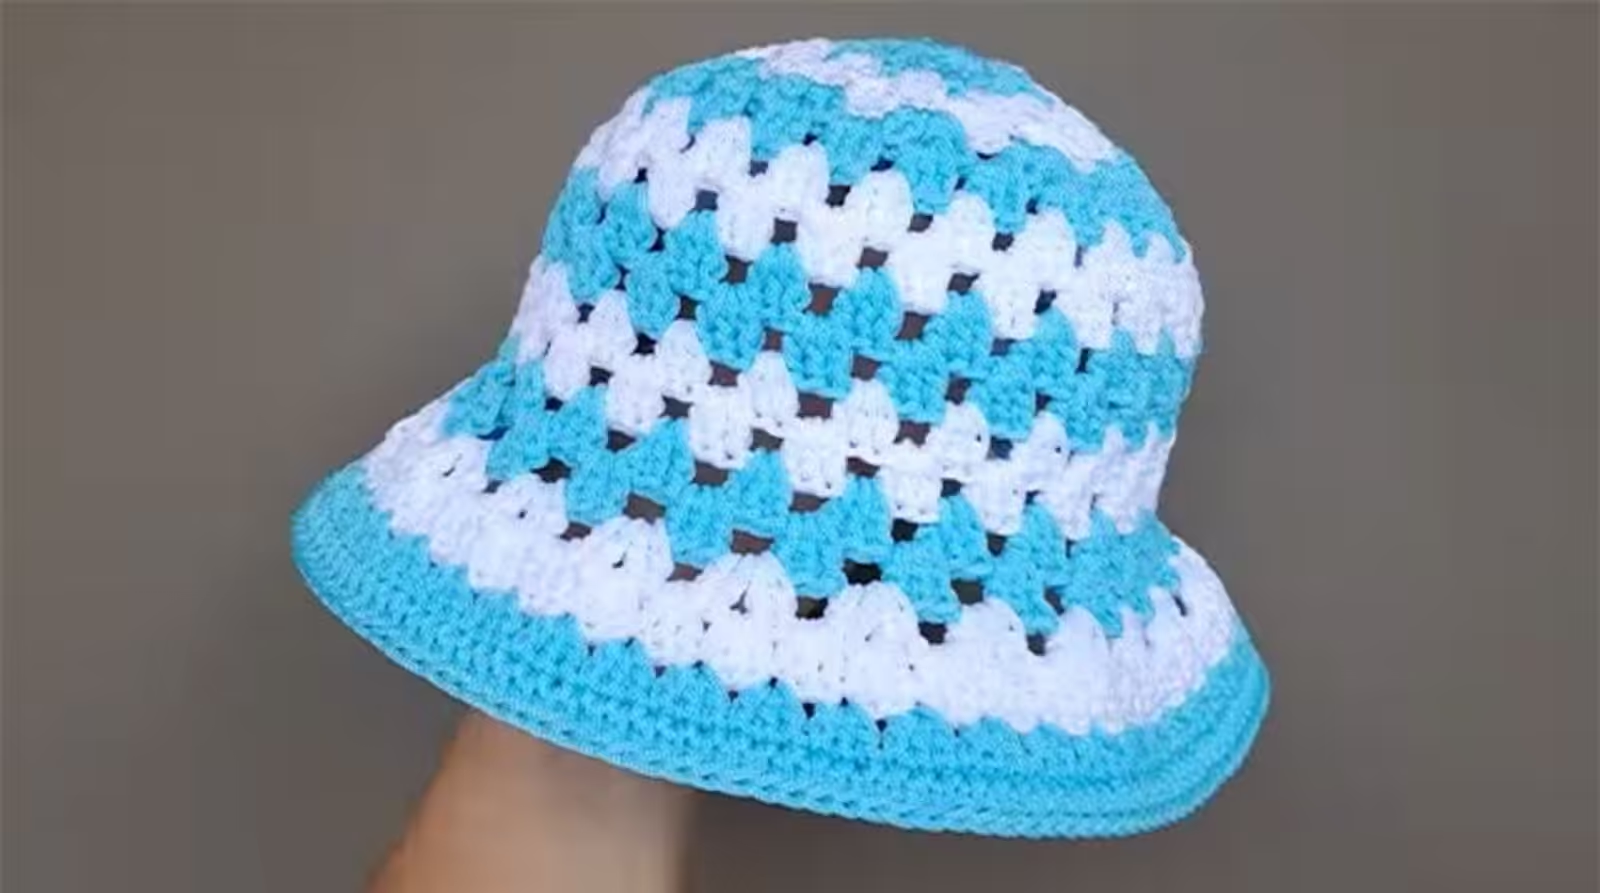
For a vibrant design, alternate between your two yarn colors every couple of rounds. This will create a striped effect.
Continue until the body of the hat reaches the desired length, forming a soft taper that hugs the head comfortably.
The Brim
The brim is created by gradually increasing stitches in each round, allowing the fabric to fan out naturally. For added stiffness and structure, switch to single crochet stitches for the brim.
Round 1: Work 1 sc in the next 2 stitches, then 2 sc in the next stitch. Repeat this sequence (1 sc in next 2 stitches, 2 sc in next stitch) around the entire brim.
Round 2–4: Continue increasing evenly in each round, adjusting the increase frequency to achieve your desired flare and width for the brim.
Optional Final Row: For a decorative and sturdy edge, work a reverse single crochet (also known as crab stitch) around the entire brim. This creates a rope-like finish.
Finishing
Fasten off your yarn and use a yarn needle to weave in all loose ends securely. Take care to hide them neatly within the stitches.
Olivia’s Tips
Choosing the right yarn for this summer hat is key! The pattern suggests shiny plastic yarn, which is fantastic for structure and breathability. If you’re having trouble finding that specific type, look for other lightweight, durable yarns that hold their shape well, like some cotton blends or raffia-style yarns. Remember, the goal is a hat that feels light and airy, not heavy or stiff.
Don’t be afraid to experiment with color. Alternating colors every few rounds adds so much personality to the hat. You could go for classic nautical stripes, a bold gradient, or even subtle contrasting shades. And for that extra touch, consider adding a ribbon through the base or a crocheted flower. These small details can really make the hat your own, or create a truly special gift!